Sketch your memories in stunning detail with our photo-to-realistic drawing converter.

  1. 1️⃣ Download Sketch Drawer.
  2. 2️⃣ Load Image.
  3. 3️⃣ Choose Drawing Style.
  4. 4️⃣ (Optional) Adjust Settings.
  5. 5️⃣ Save the result.
 Download for Free
️Posted by:
Eugene editor-in-chief of the SoftOrbits, candidate of sciences in computer science, CTO of the SoftOrbits / 📅 Last updated on:  2024-06-10

I needed a realistic sketch of an old family photo for a special gift. Photoshop's way seemed like climbing Mount Everest for a Sunday stroll. Tried free online tools - some okay, some...not so much. Downloaded Sketch Drawer - looked promising, and wouldn't you know it, turned the photo into sketch in minutes. Saved the day!

📙Quick summary

  1. Sketch Drawer   
      Download 
  2. Photoshop   Read More
  3. Free Software   Read More
  4. Mobile Apps   Read More
Let me tell you about a few simple picture to drawing tools!

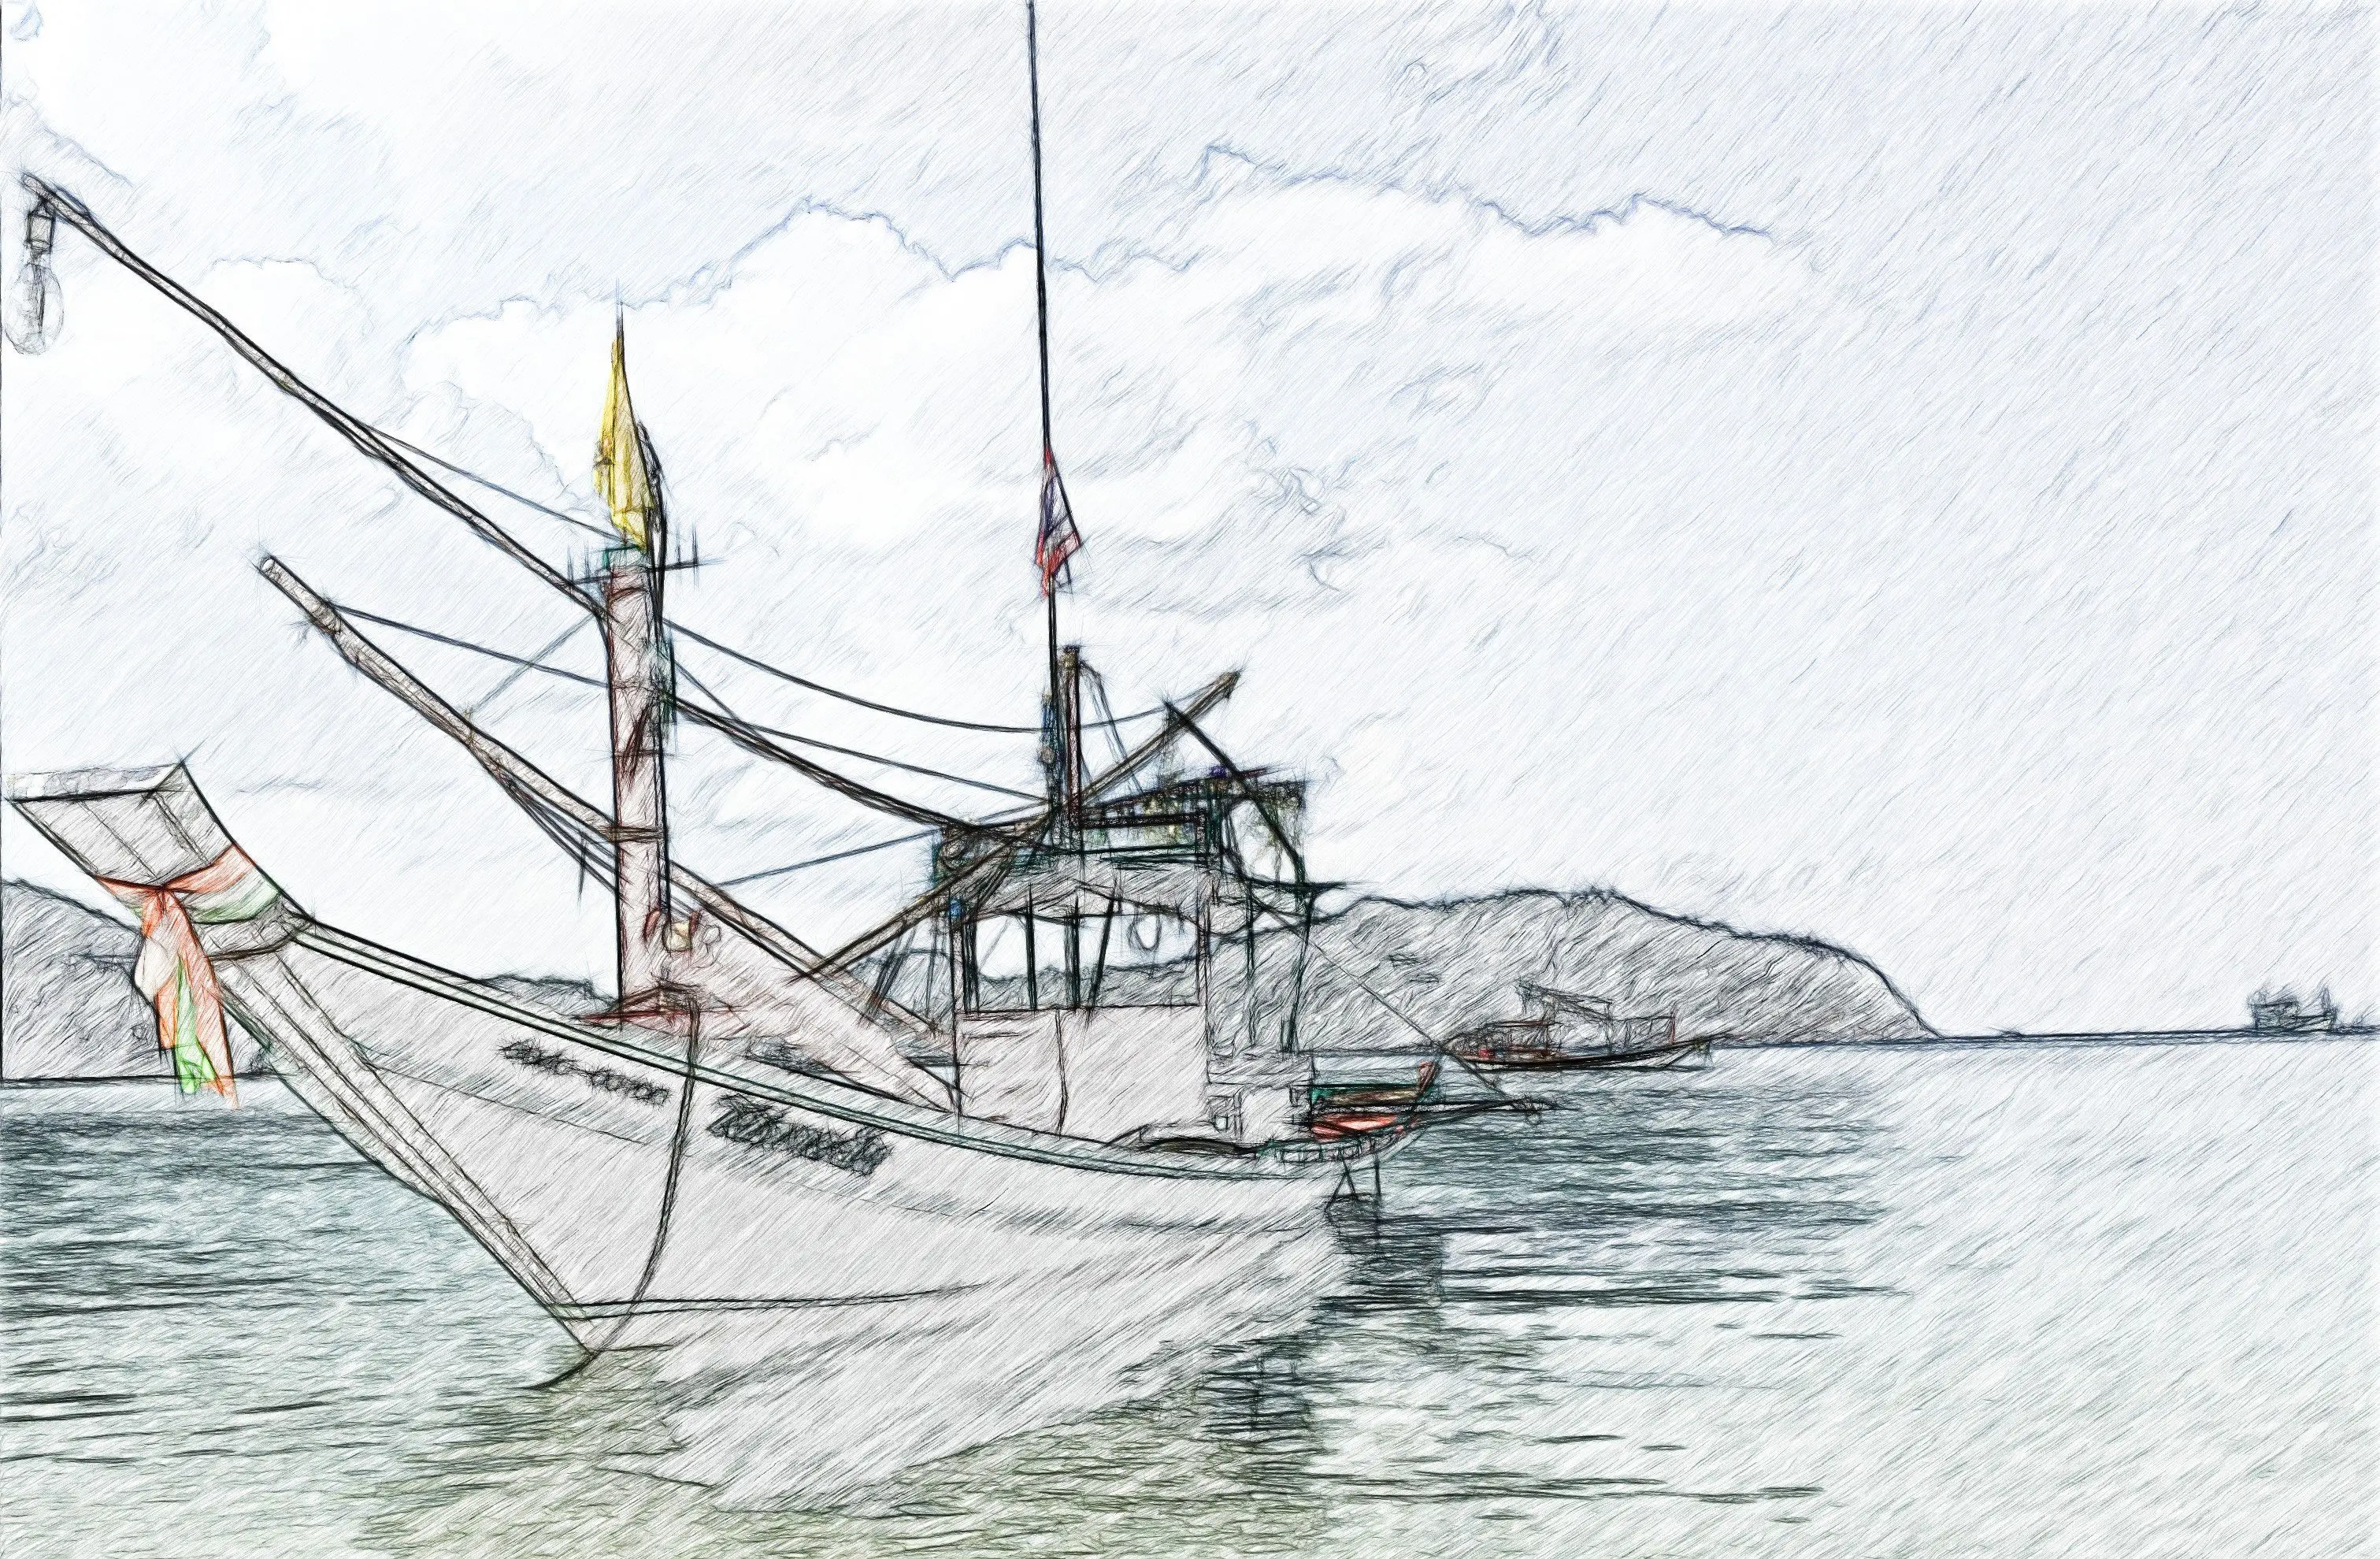
Boat image..
Convert boat Picture to Drawing..

How to Transform a Picture into a Realistic Drawing

There are many options if you’re looking for a picture drawing tool. With dozens of features, filters and effects, choosing the one that suits your needs is a bit difficult.
That’s why we’ll first discuss image to sketch converter software, a tool specially designed for changing images into sketches. Once you briefly review the steps, you can check out a few more recommendations!
Covering even Photoshop and smartphone apps, this list will help you choose the perfect image to realistic drawing converter for your artistic needs.

Picture to Realistic Drawing Converter

Sketch Drawer is an intuitive tool that allows you to change any image into a pencil drawing. It even comes with presets for controlling the type of shading, colours, paintbrush effects, etc.
Picture to drawing software..

From a detailed sketch with shadows to stencils and minimal line drawings – you can use this one program for any images!
The program will process the whole image independently and let you make the final adjustments while showing you a real-time preview of the final result!

How to use Picture to Line Drawing Converter: Tutorial

Sketch Drawer has dozens of combinations of styles and presets. We’ll learn how to turn a picture into a realistic drawing using this program and some brief descriptions of the options available.

Open the photo

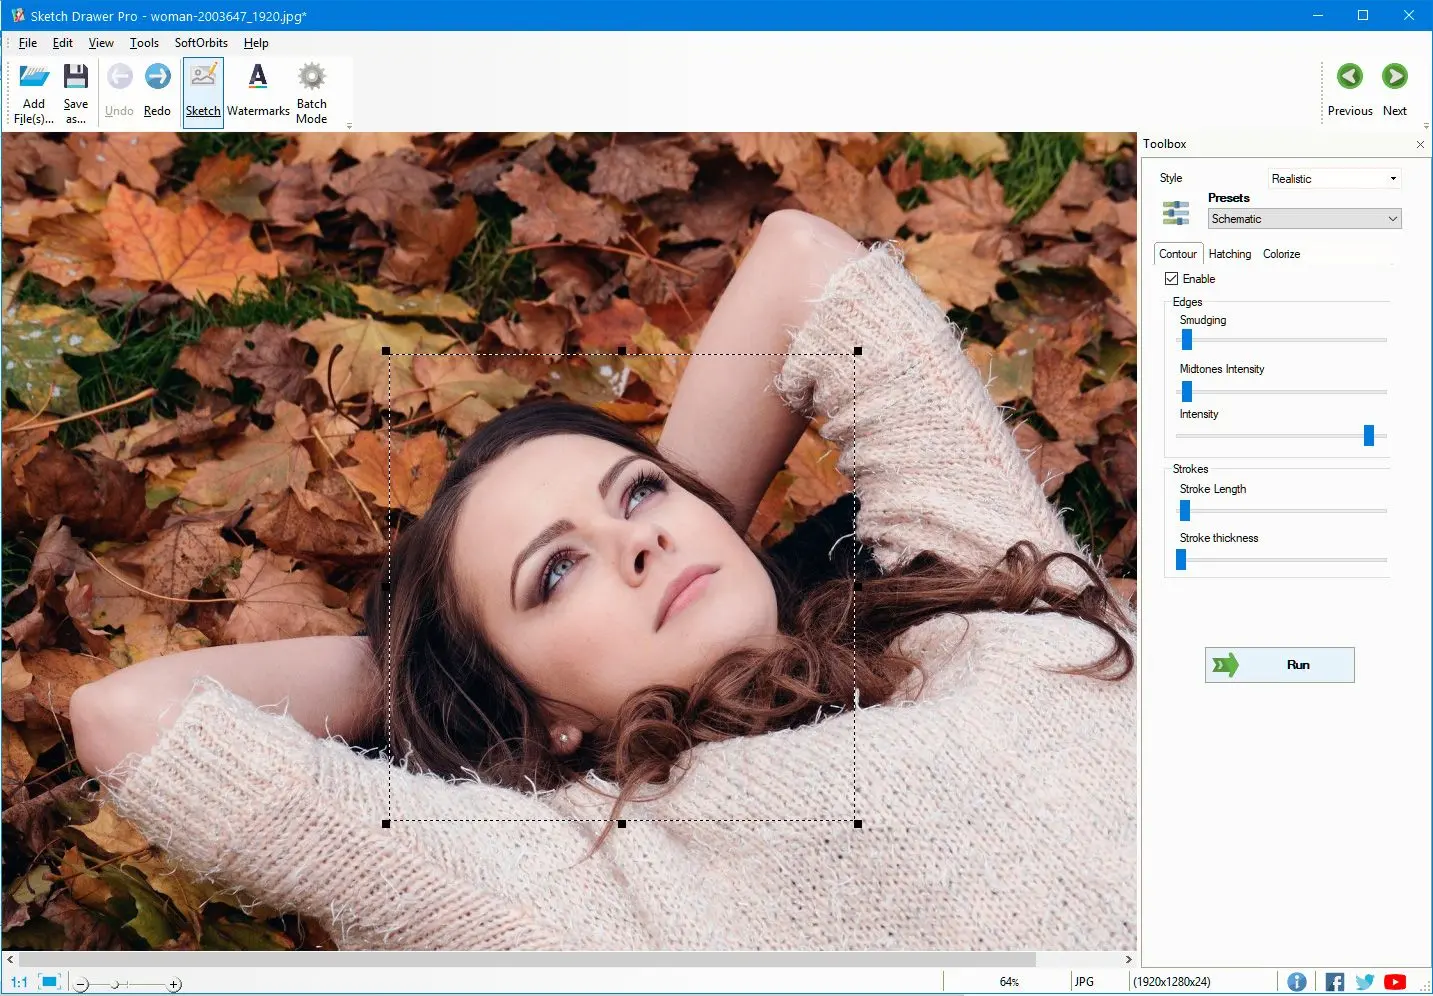
When you install Picture to Realistic Drawing Converter and open it, you will see the option of Add File. Use this to open the image you want to edit or drag and drop.

Picture to drawing converter: Open the photo..

Select the Sketch Style

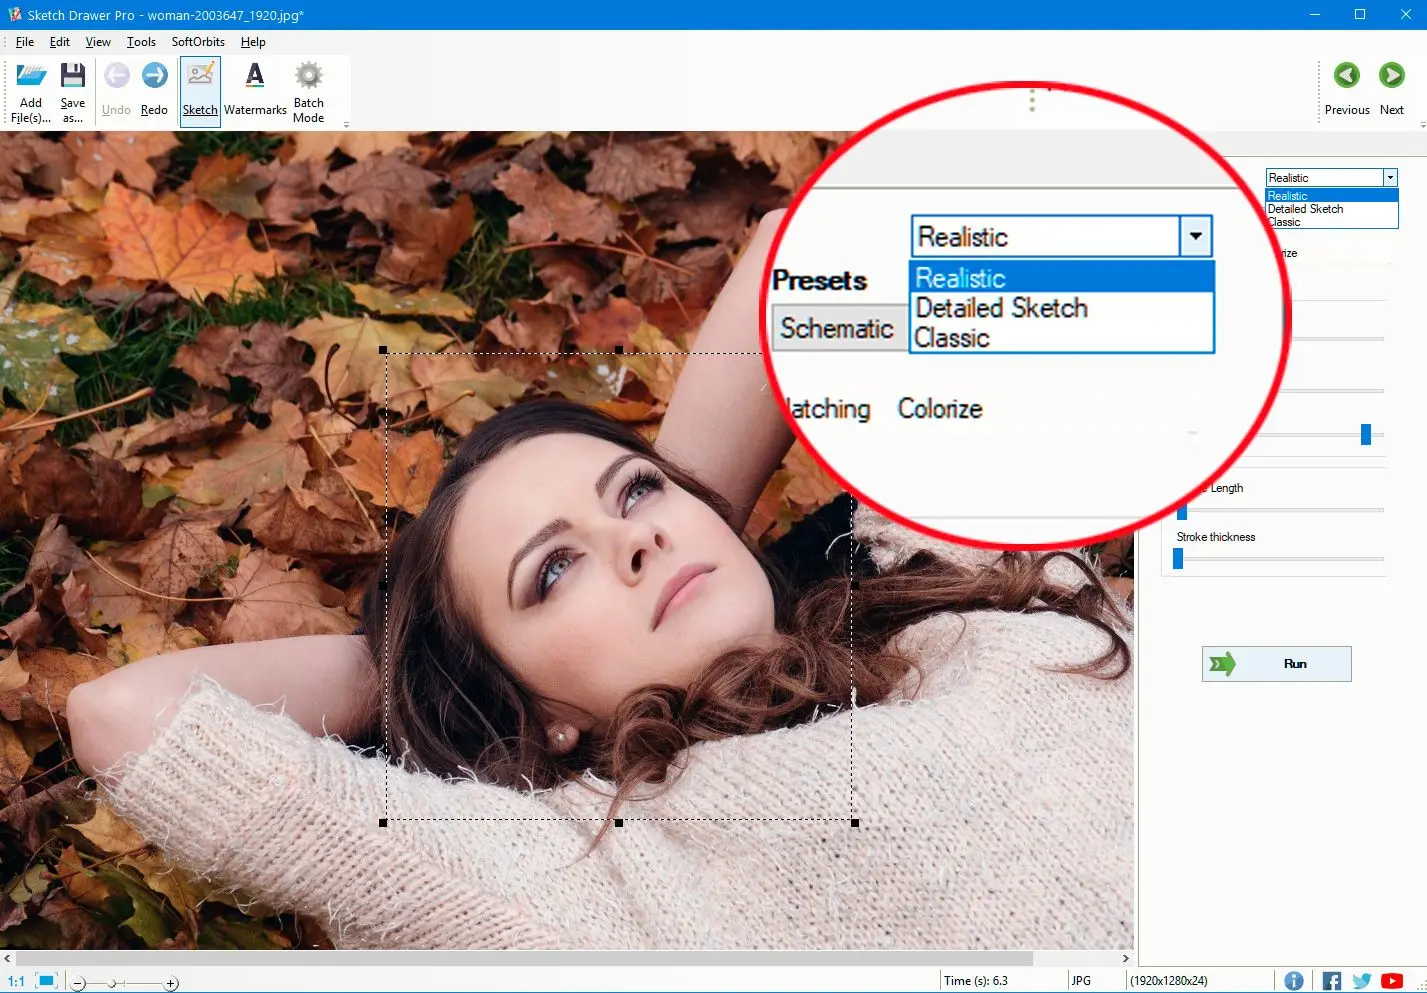
SoftOrbits tool gives you a toolbox on the right side. The first option you’ll see under it will be Style, from which you can select Realistic, Classic or Detailed.
Realistic: Realistic style will give you a good balance between subtle outlines and detailed shading. This style will also retain the lights and shadows so that the final image will look like a professional work of art.
Detailed: Like the name suggests, the detailed style will emphasize the details, especially the parts which require shading. You’ll get almost no white areas, as even the bright areas will have some light pencil shading. This style is great for landscape photos, although portraits require a bit more minimal look.
Classic: The classic style is the best for creating simple line drawings and subtle portraits. This style will give you very simple shading and bold outlines, which is great for creating a drawing with a soft look.

Picture to drawing converter: Select Style of drawing..

Select the preset

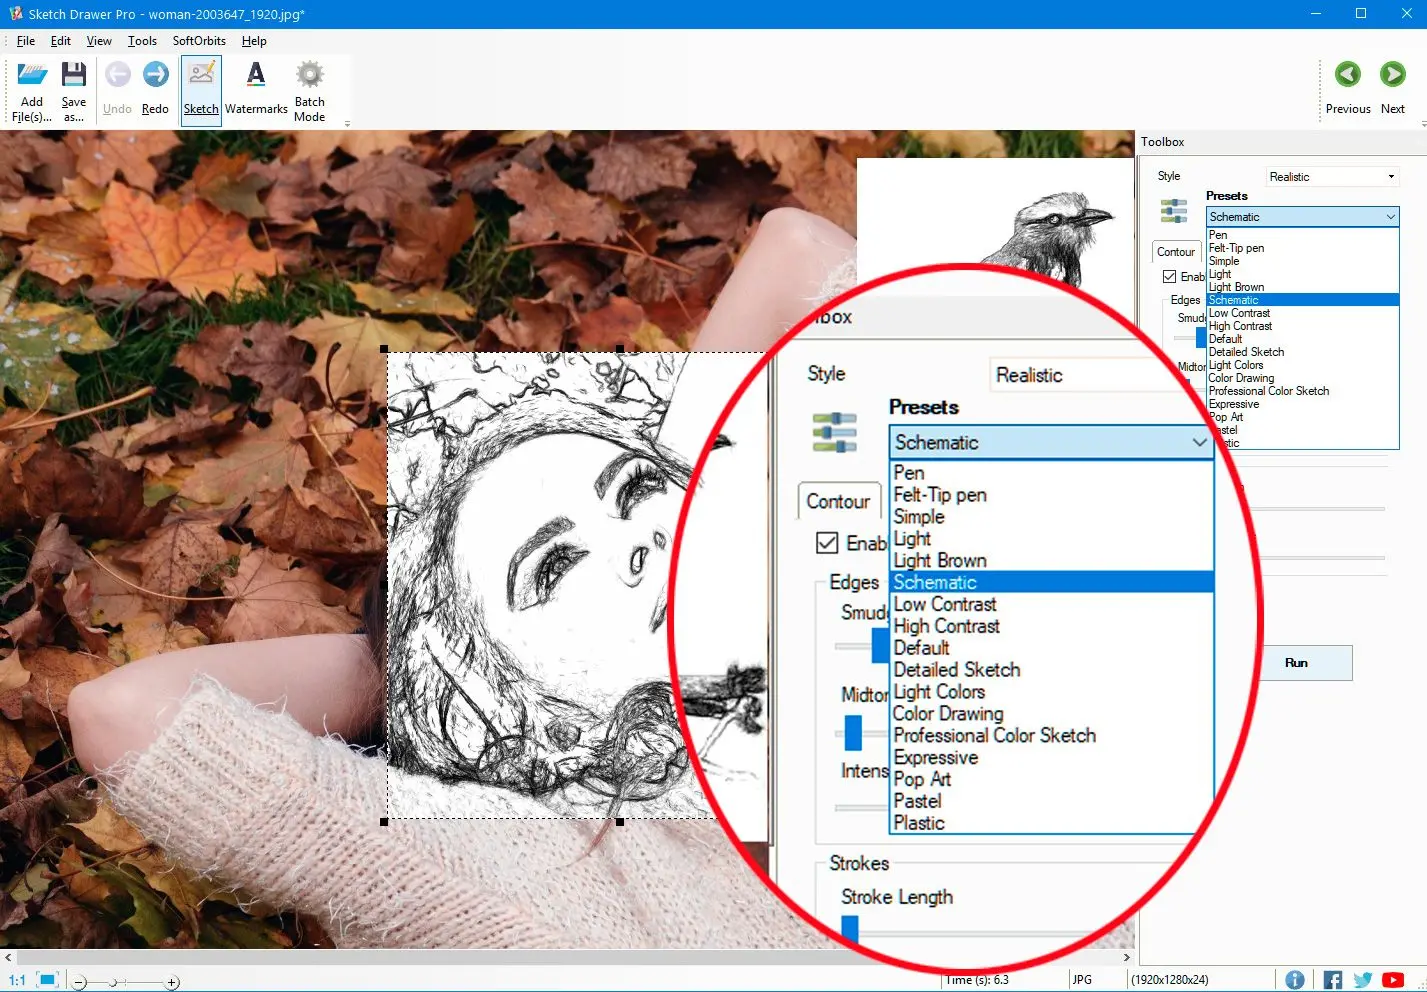
Unlike the sketch style, the preset affects the finer details of the sketch, like the colour effects, the thickness of pencil strokes, overall contrast etc.
It has a lot of different options, including felt tip pen, colour drawing, pop art, low contrast art, high contrast, soft black and white preset, simple paintbrush etc. A few of the most important presets are Simple, Light and Pen.
The Simple preset gives a paintbrush look, while the Pen preset is good for sharp, bold borders with a medium level of shading. The Light preset is great for creating line drawings and stencils because it results in less shading and more black-and-white areas!
A good tip is to watch the preview box over the original photo. That box will show you how the final sketch will look with different settings!

Sketch Drawer: Select Preset of drawing..

Adjust the final settings

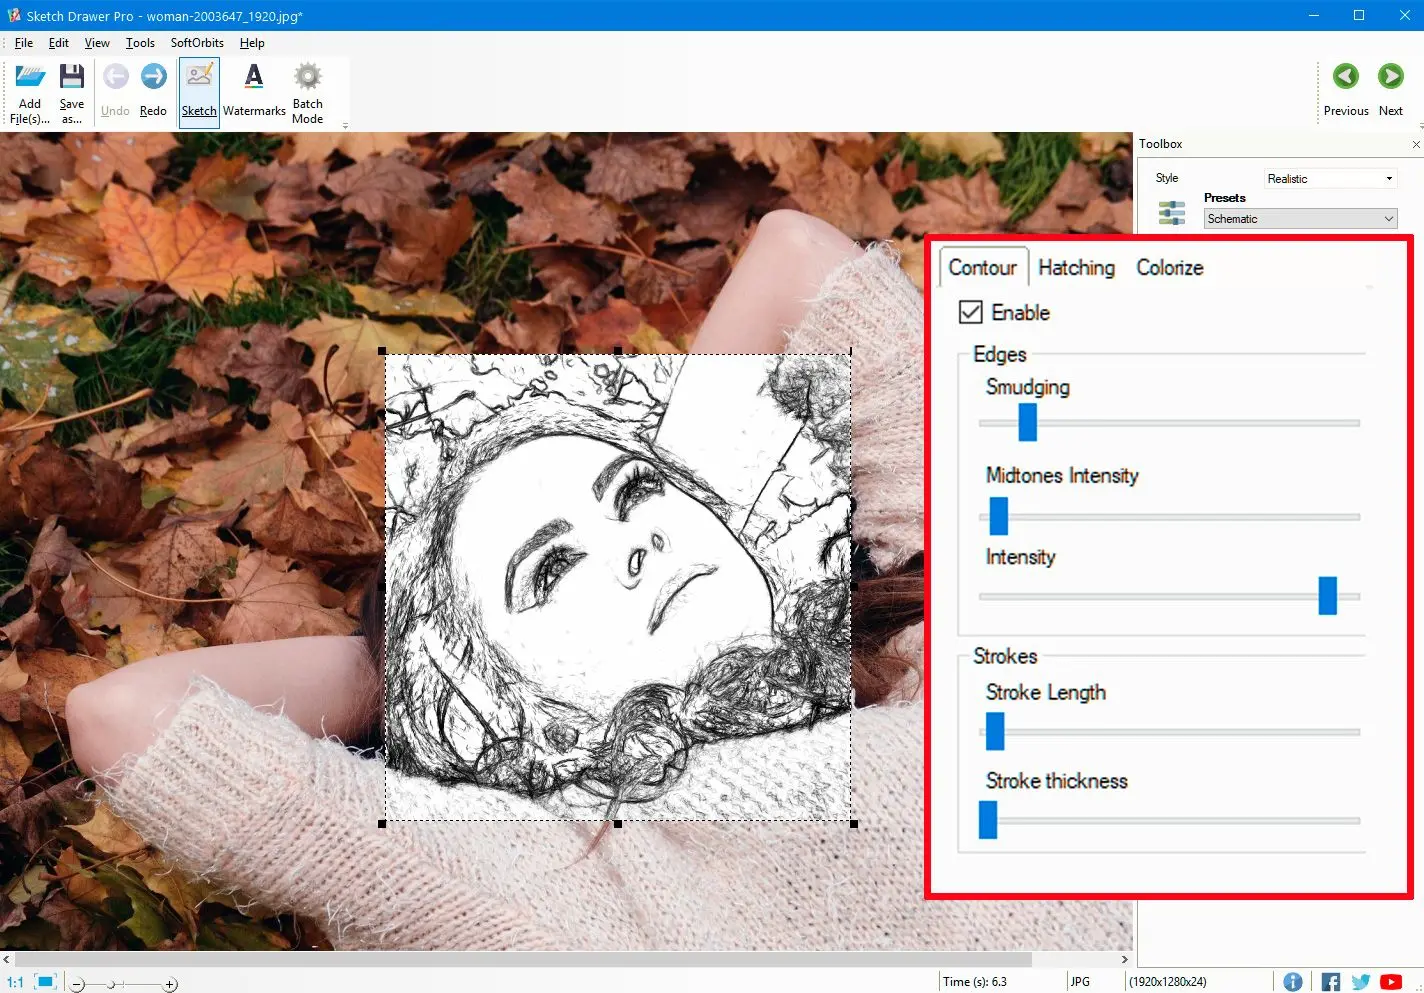
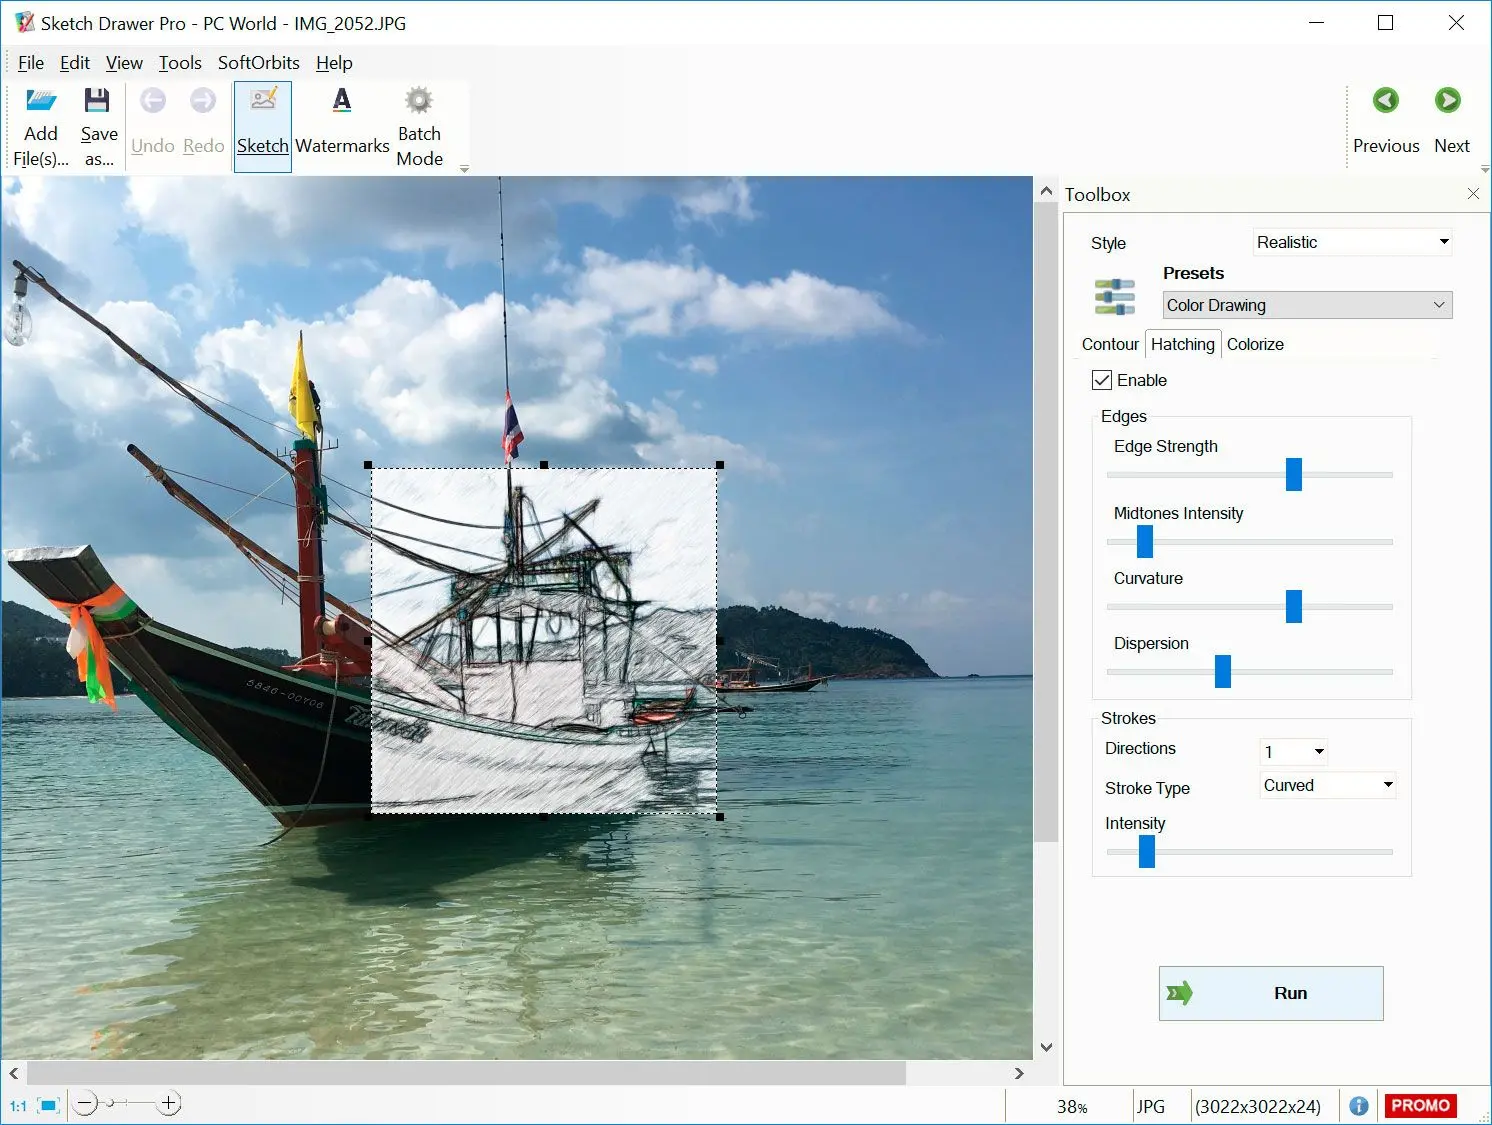
Apart from these options, it also gives you control over these settings – Contour, Hatching and Colourization . If you enable these options, you can change the edge strength, amount of shading, stroke thickness and intensity of each feature.
Contour refers to the outline of the converted photo, and increasing the edge strength or intensity here will give you bolder and more detailed borders.
Hatching settings affect the shading applied; darker areas will have more zigzag lines. Since excessive cross-hatching looks unnatural, keeping the stroke thickness and strength to a minimum will be better. This will help you create shadings without making it seem like a computer did all the work!
Colourization adds colour to the image, and you can change a black-and-white image into a colourful one. You can choose which colours are used and whether the image has a uniform pencil or a free-flowing paintbrush effect.

Picture to drawing: Set settings of the image..

Save file

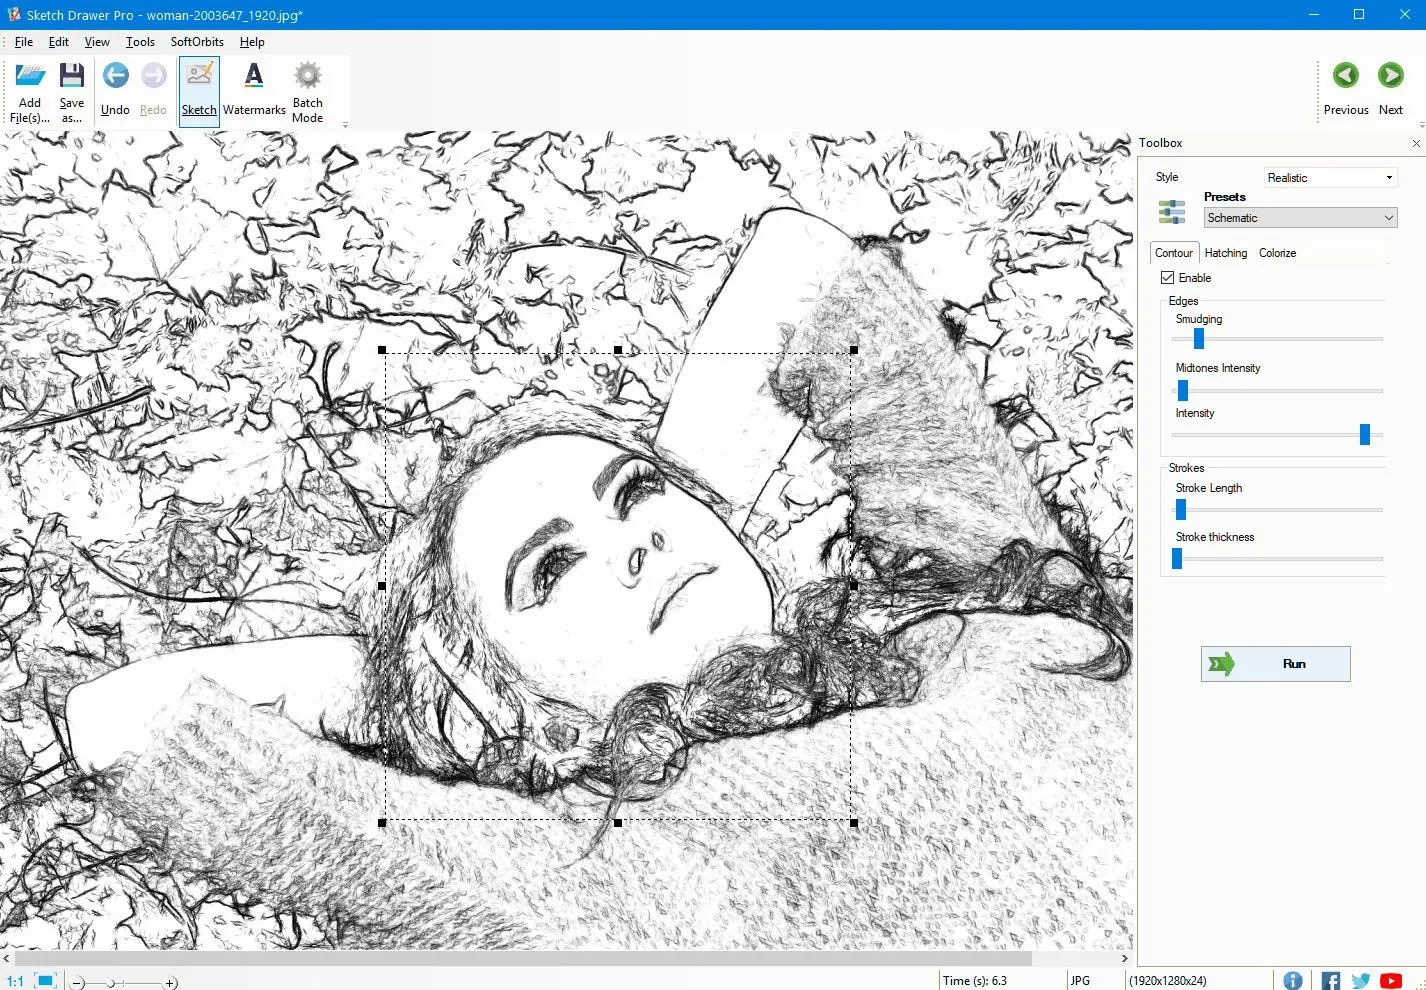
Once all your settings are applied, click on Run and see Sketch Drawer convert the photo into a sketch. Then you must click on Save!

Sketch Drawer: Save the result..

Sketch Drawer Sketch Drawer

Sketch Drawer: a Handy Photo to Sketch Converter

 Download for Free

Video Tutorials

Picture to Sketch Conversion Made Easy

Sketch Drawer is a software program that allows you to turn your photos into artistic sketches with just a few clicks.
👍 Strengths of Sketch Drawer:
  • Simple and user-friendly interface: it boasts a straightforward interface, making it easy for beginners and casual users to navigate. No artistic experience is required!
  • Variety of presets and effects: Experiment with different art styles and effects to achieve the perfect look for your photos.
  • Batch processing: Save time by converting multiple photos at once, ideal for large collections or projects.
  • Optional customization: While presets offer a quick solution, this tool allows you to fine-tune details like stroke thickness and intensity for a more personalized touch.

🤔 Things to Consider with Sketch Drawer:

  • Limited editing capabilities: Unlike professional editing software like Photoshop, Sketch Drawer focuses primarily on photo-to-sketch conversion. Advanced editing features might be absent.
  • Software cost: While some free online alternatives exist, it might require a purchase or subscription.
🌟 Sketch Drawer is a Great Choice for:
  • Quickly creating artistic sketches from photos: If you want to add a creative touch to your photos without the hassle of manual drawing or complex editing tools, it is a great option.
  • Casual users and beginners: The user-friendly interface makes this program accessible to anyone, regardless of artistic experience.

However, if you:

  • Need precise control and advanced editing features: For professional-grade results or intricate artistic details, consider exploring a more comprehensive editing software like Photoshop.
  • Prioritize completely free solutions: Free online converters might be a suitable alternative if budget is a major concern.
SoftOrbits software offers a user-friendly and efficient way to change photos into sketches, but for more advanced editing or completely free options, explore the alternatives!

Way #2: How To Convert a Photo into a Realistic Drawing in Photoshop

At SoftOrbits, our goal is to deliver accurate and trustworthy information.

  • We pick products for reviews based on what people like and what is popular.

  • Our testing phase focuses on spotlighting the prime features of a product and identifying its most suitable software.

  • User reviews from top sites guide us in crafting our product reviews.

  • We gather feedback from our users, understanding their thoughts on SoftOrbits software and other products.

If you already have Photoshop on your laptop, you can follow the following steps.

How to Transform Picture to Realistic Drawing in Photoshop

Open the photo and duplicate the layer

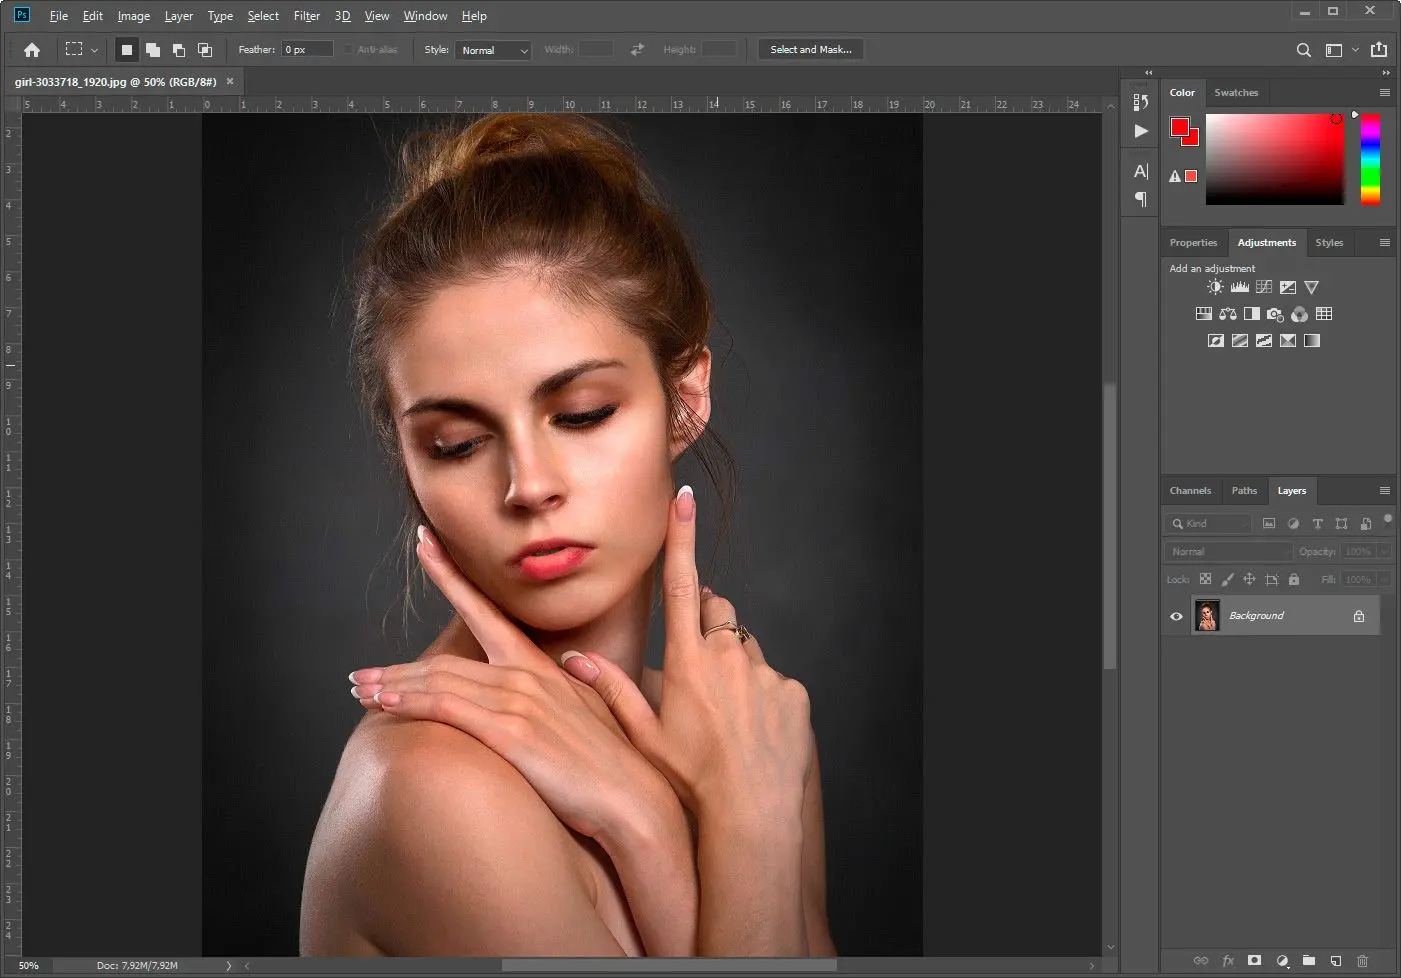
When you open the image in Photoshop, it’ll be loaded as the Background layer in the Layer panel of the toolbar.

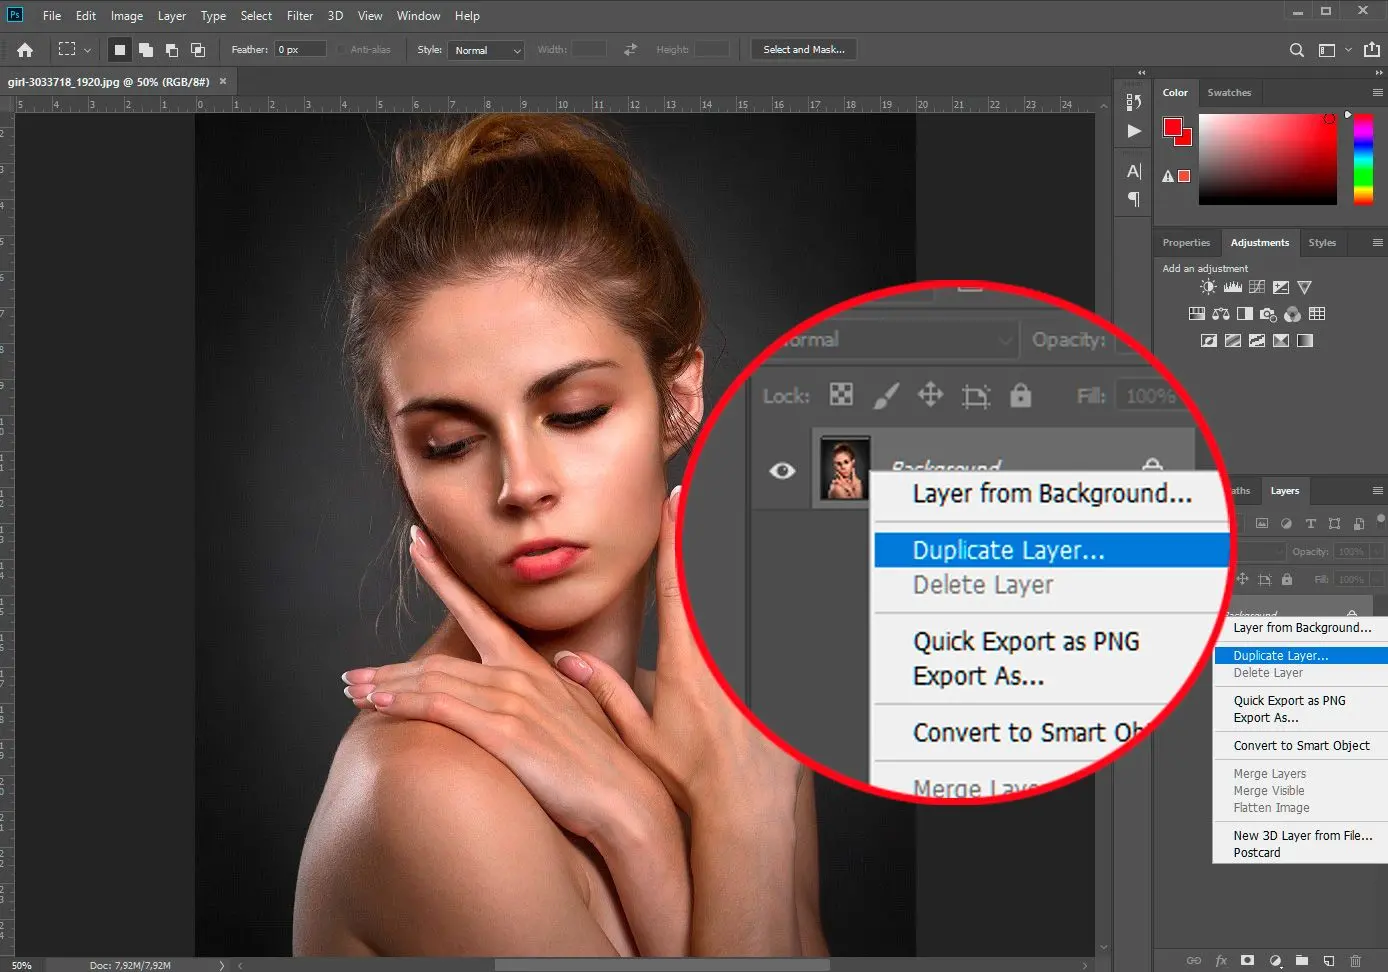
Drag and drop this onto the folded paper icon to create a new layer. Once the original photo is duplicated, you’ll see 2 layers – Background and Background copy.

Photoshop: Open the photo..

Desaturate and duplicate again

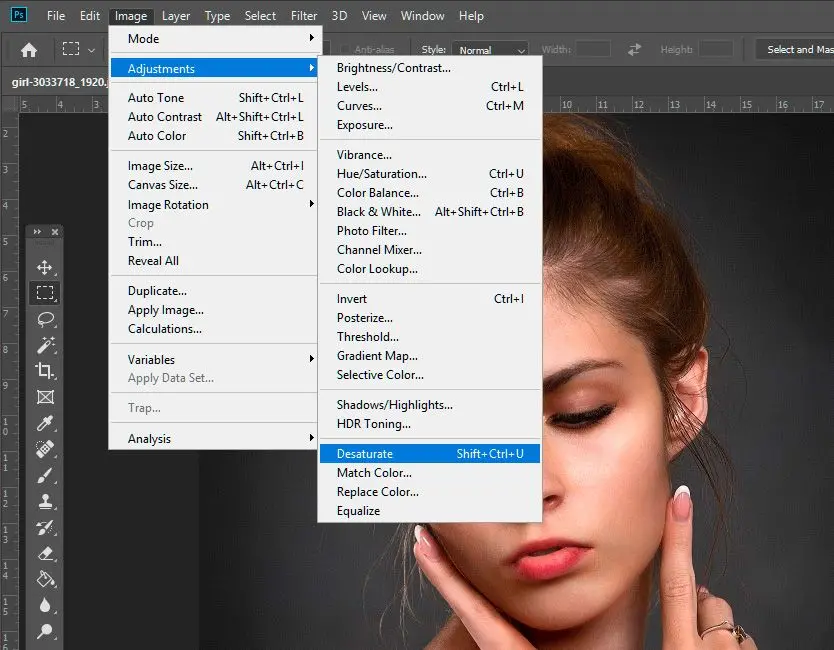
You must remove all the colours from the duplicate layer and make it black and white. Go to Image > Adjustments > Desaturate.

Now, this Background copy layer has to be copied again. Use the same drag-and-drop method to create a 3rd layer, called Background copy 2.

Photoshop: Duplicate layer..

Photoshop: Go image to black and white..

Invert

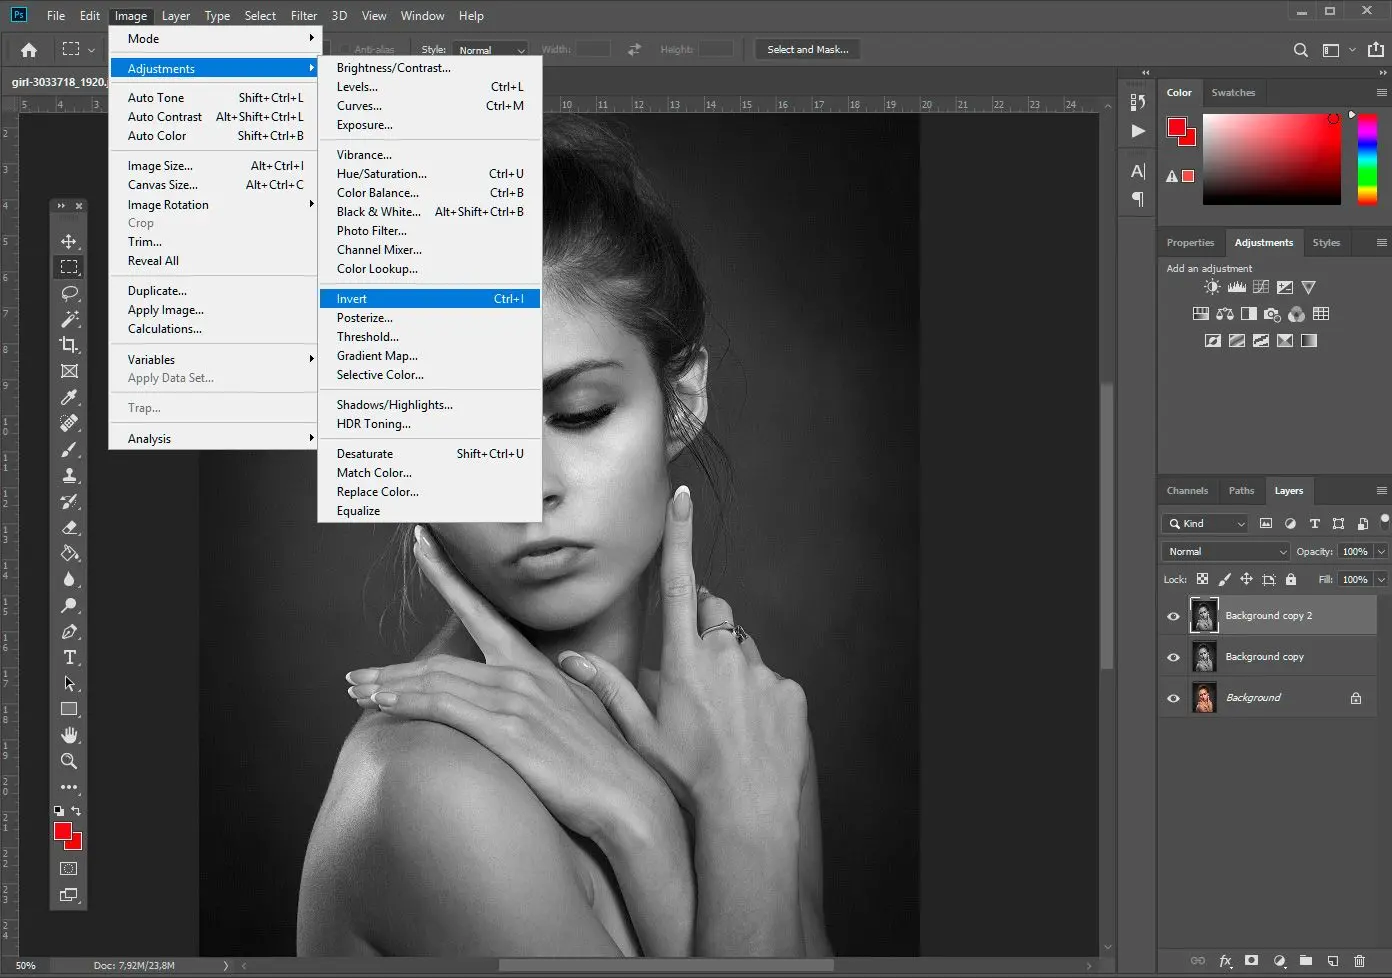
We have to invert the 3rd layer, which will give a film negative look, turning dark areas light and light areas into black patches. You can do this by using Image > Adjustments > Invert.

Photoshop: Invert the image..

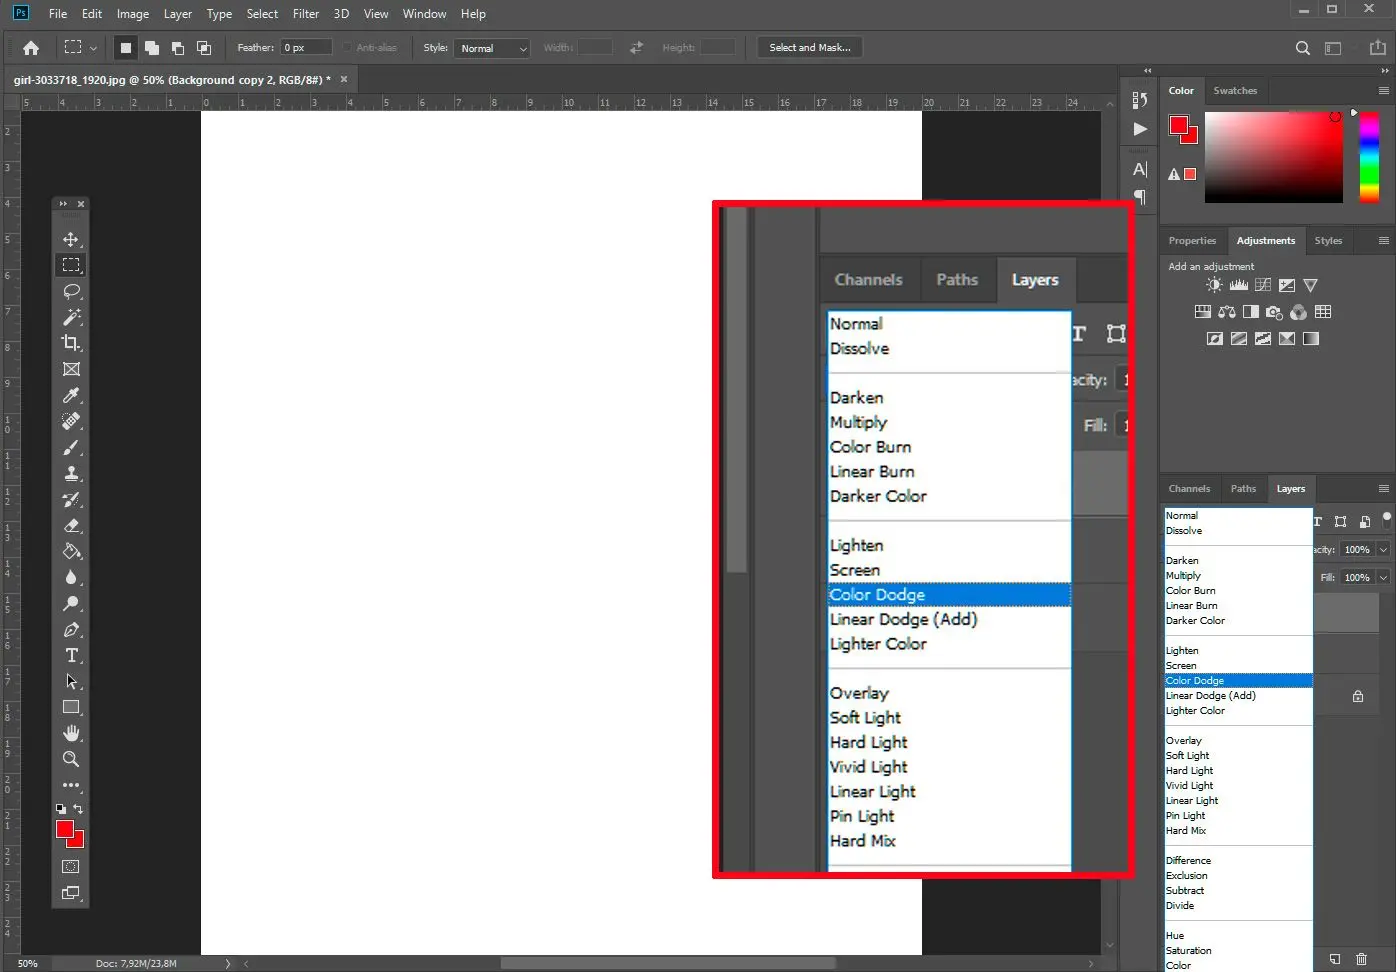
Change blend mode to Colour Dodge

When you open the Layers panel, on the top-left corner, you will see the blend mode as Normal, which is by default. Change this to colour dodge.
You should now see the Background copy 2 photo become almost completely white!

Photoshop: Change to colour dodge..

Convert this 3rd layer into a smart object

Before applying the main pancil sketch photo effect using Gaussian blur, we must change this layer into a smart object. This will keep the layer fully editable, and the changes won’t become permanent.
So, when we apply the Gaussian blur filter, we can still go back and adjust the settings as we require.
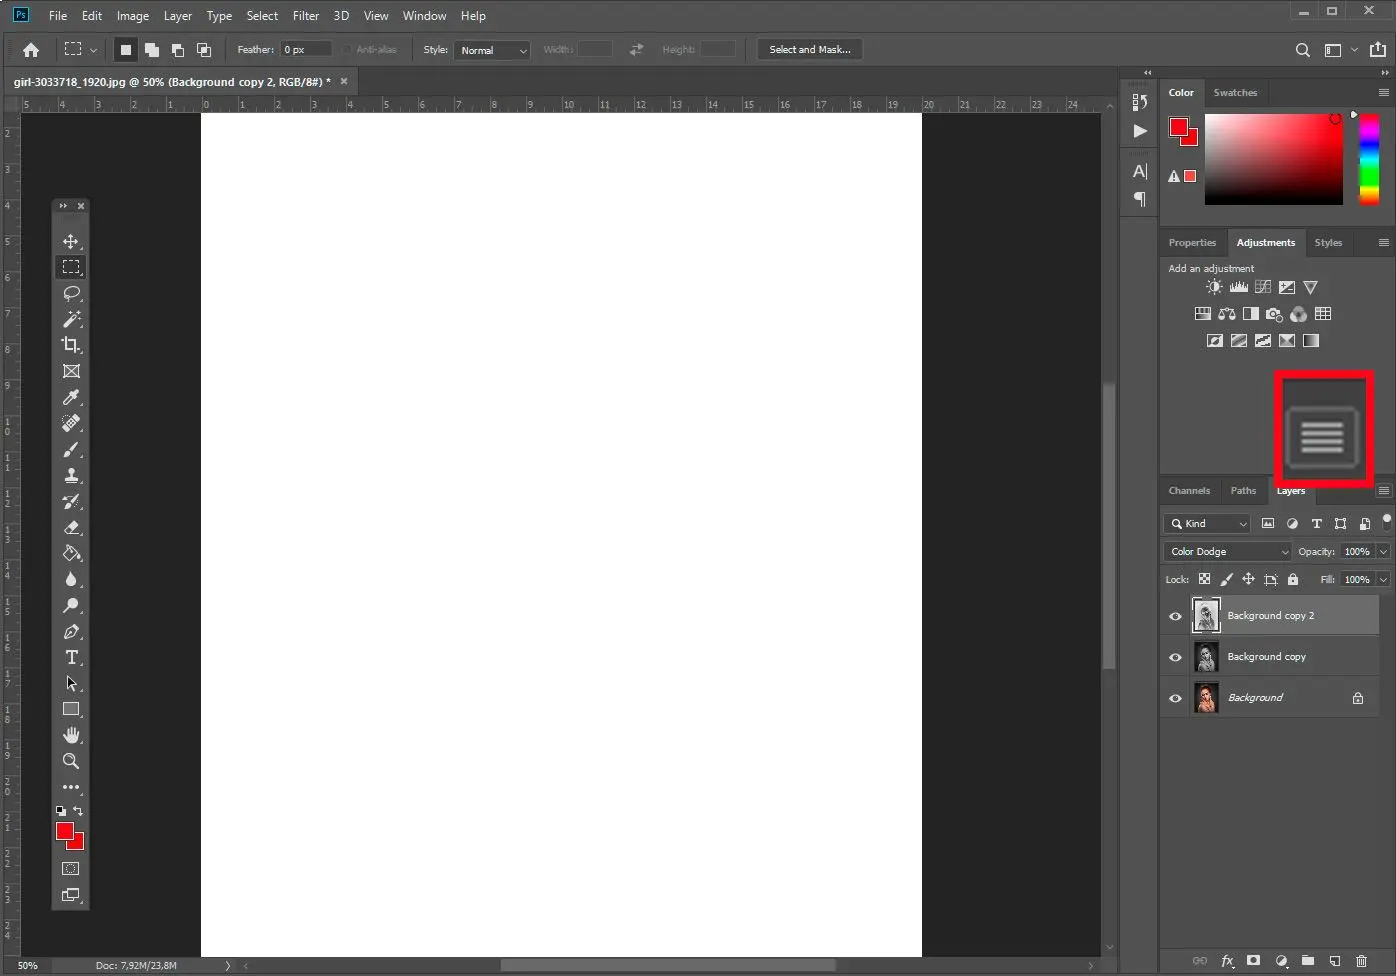
To change the layer into a smart layer, go to the Layers Panel, and click on the menu icon in the top-right corner. From that menu, you can select Convert to Smart Object.

Photoshop: Convert into smart object..

Apply Gaussian filter

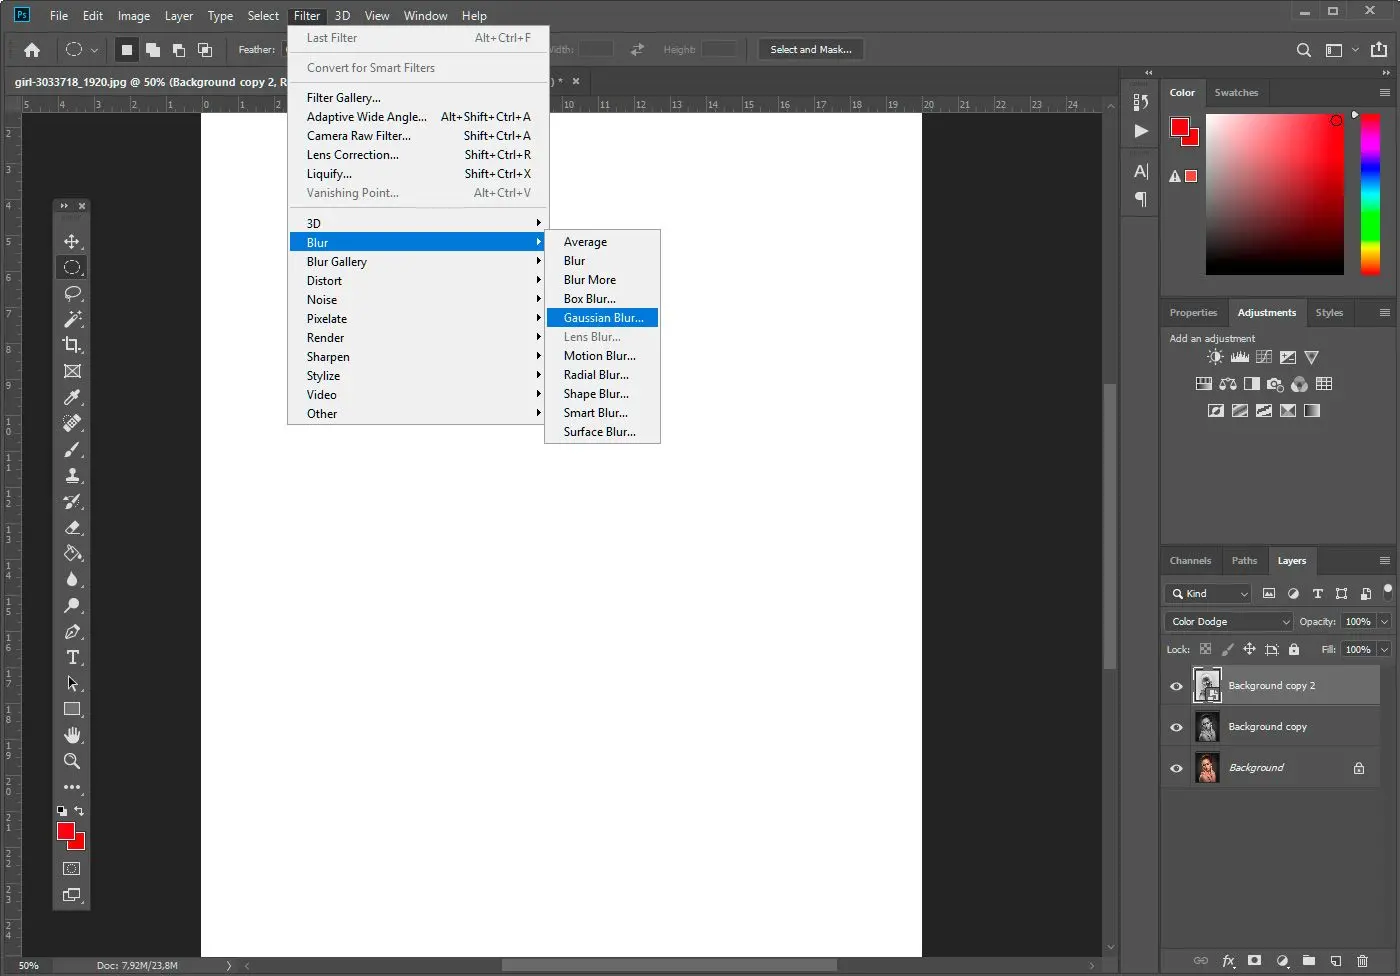
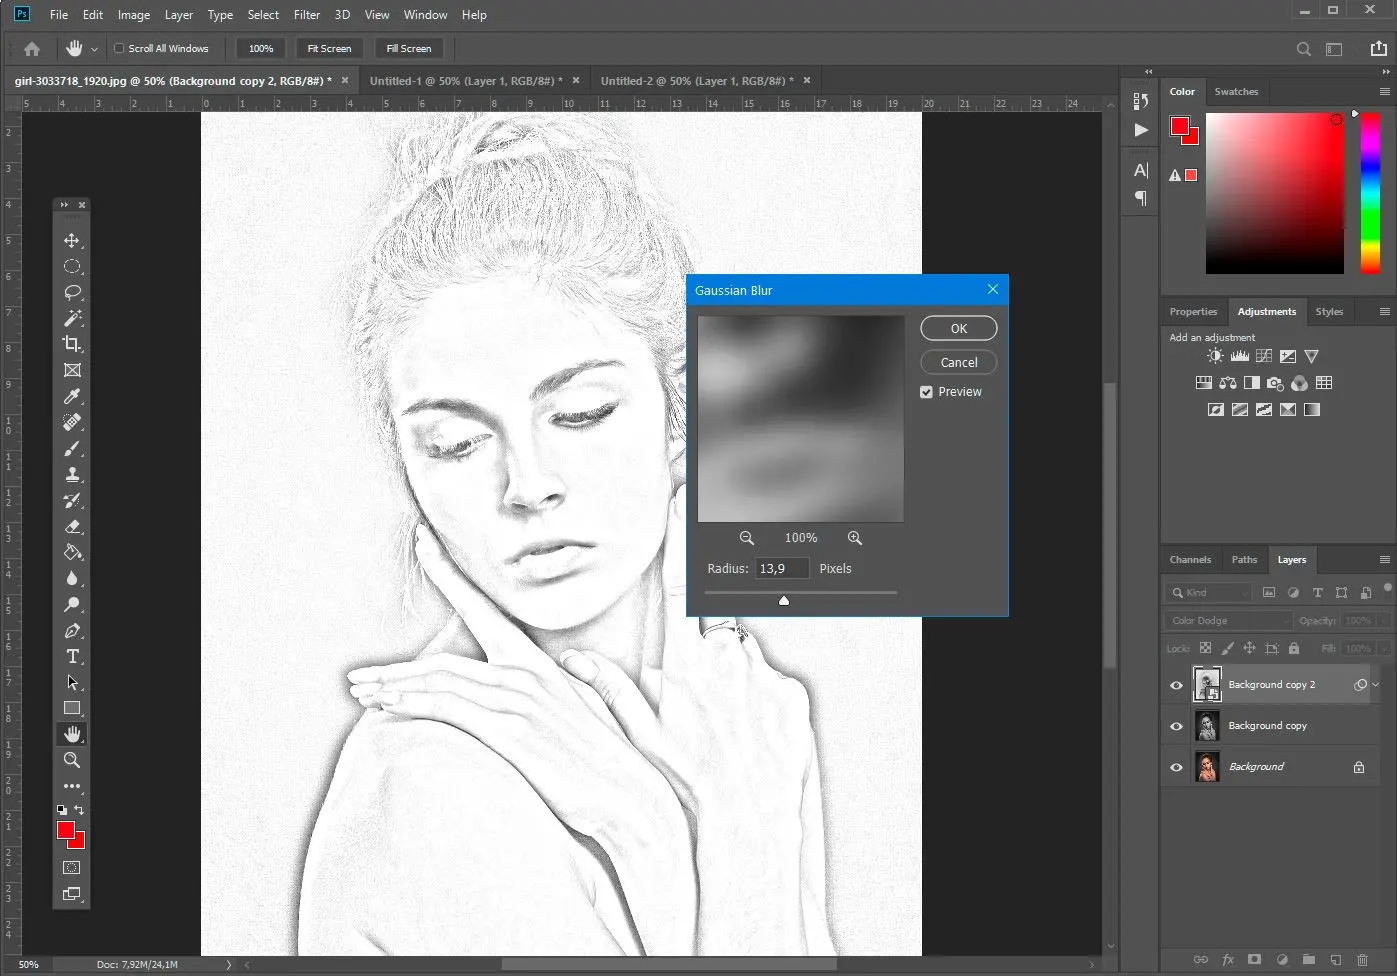
Gaussian blur filter will give the final pencil effect we are looking for! Go to Filter > Blur > Gaussian Blur.
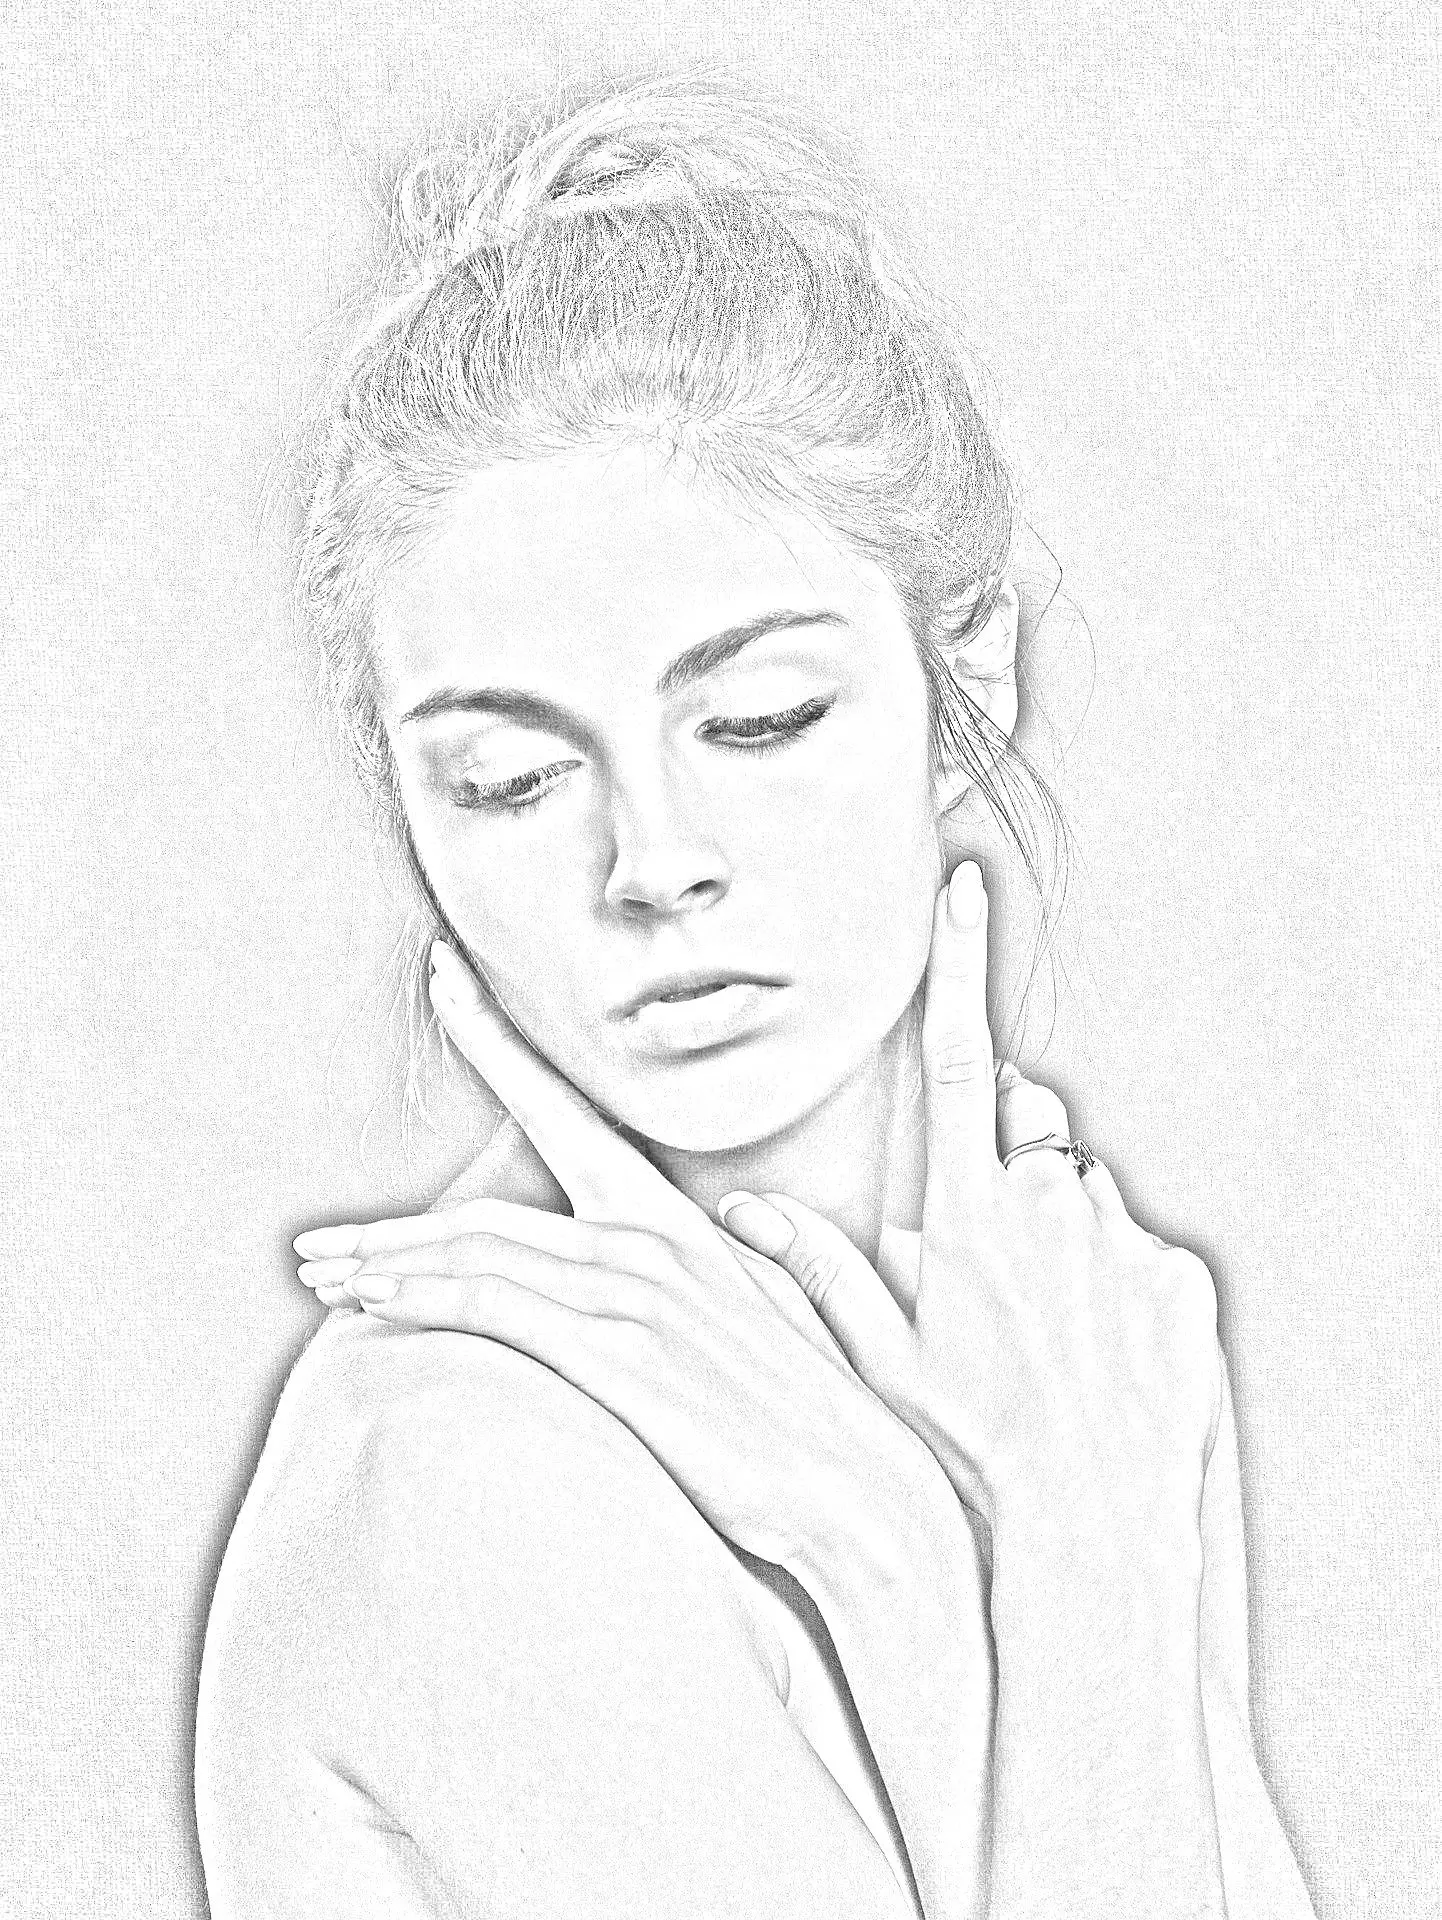
Once the filter is applied, your photo looks like a realistic drawing. You should also adjust the radius of the filter and see what look you like best! Increasing the radius allows you to create a drawing with thicker pencil strokes.

Photoshop: Convert into Gaussian blur..

Photoshop: Change Gaussian blur..

Some optional adjustments

If the result looks too bright, you can change the blend mode to Multiply to darken the image. You can add customizations and modify the shading by changing the sharpness, brightness, and contrast and using tools like Dodge and burn.
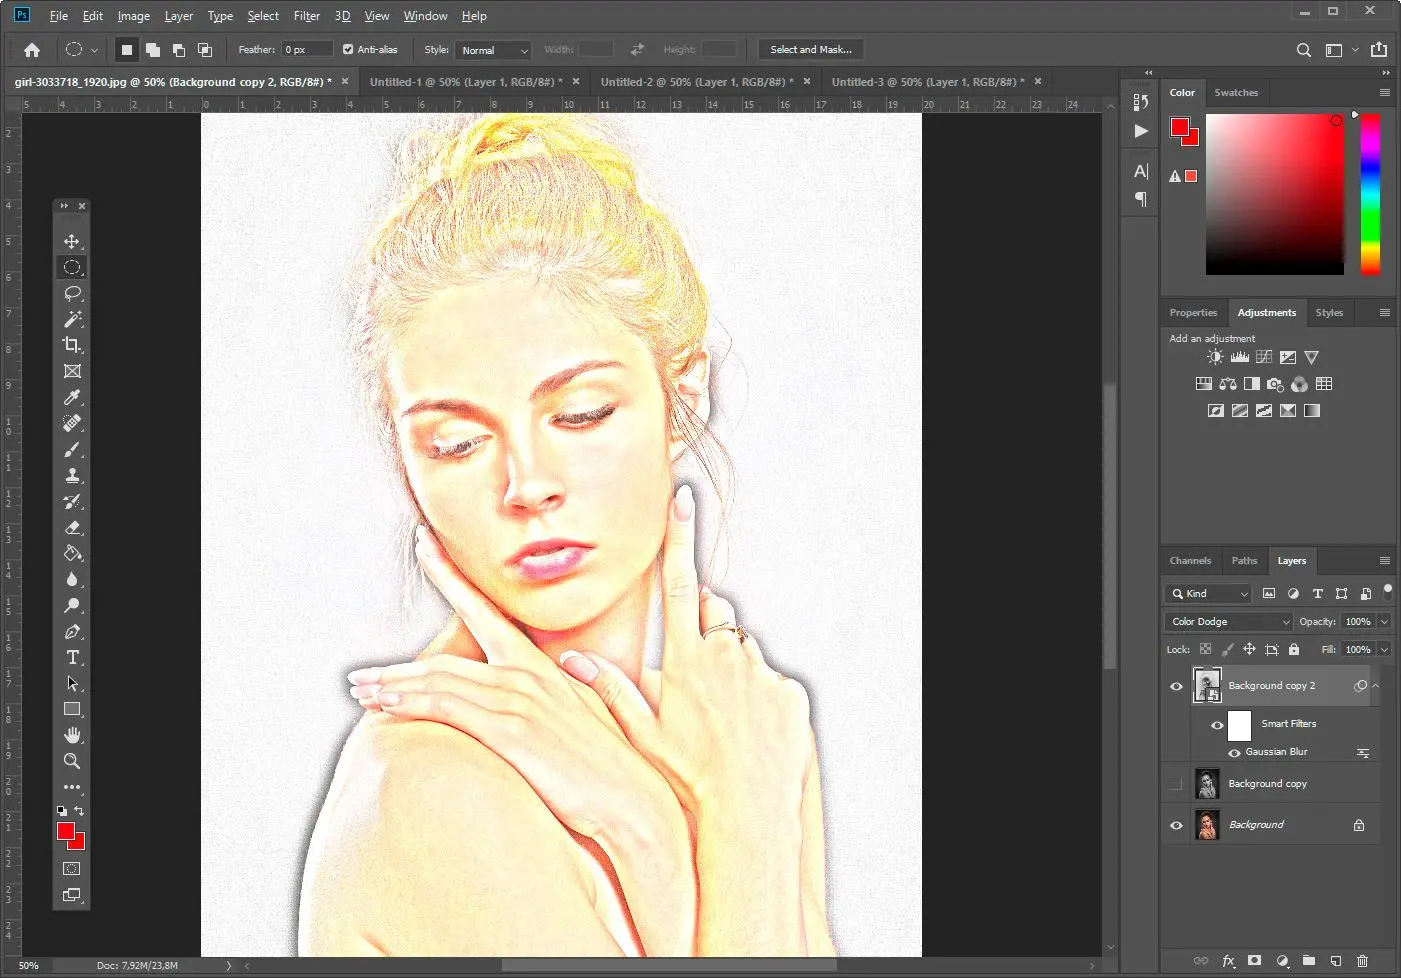
If you want to add colour to your sketch, you will have to duplicate the first layer, bring it to the top and change the blend mode to Colour.
This will mix the converted layer with the colours from the original image!
Photoshop: Add the colour..

Save image

You’re done! You can save your image once you are happy with the final effects. Try options like Torn Edges or colour filters and experiment!

Photoshop..

Way #4: Picture to Drawing: Free Software

If you want to make a photo into a realistic pencil sketch quickly on the go, you can try out these online programs!

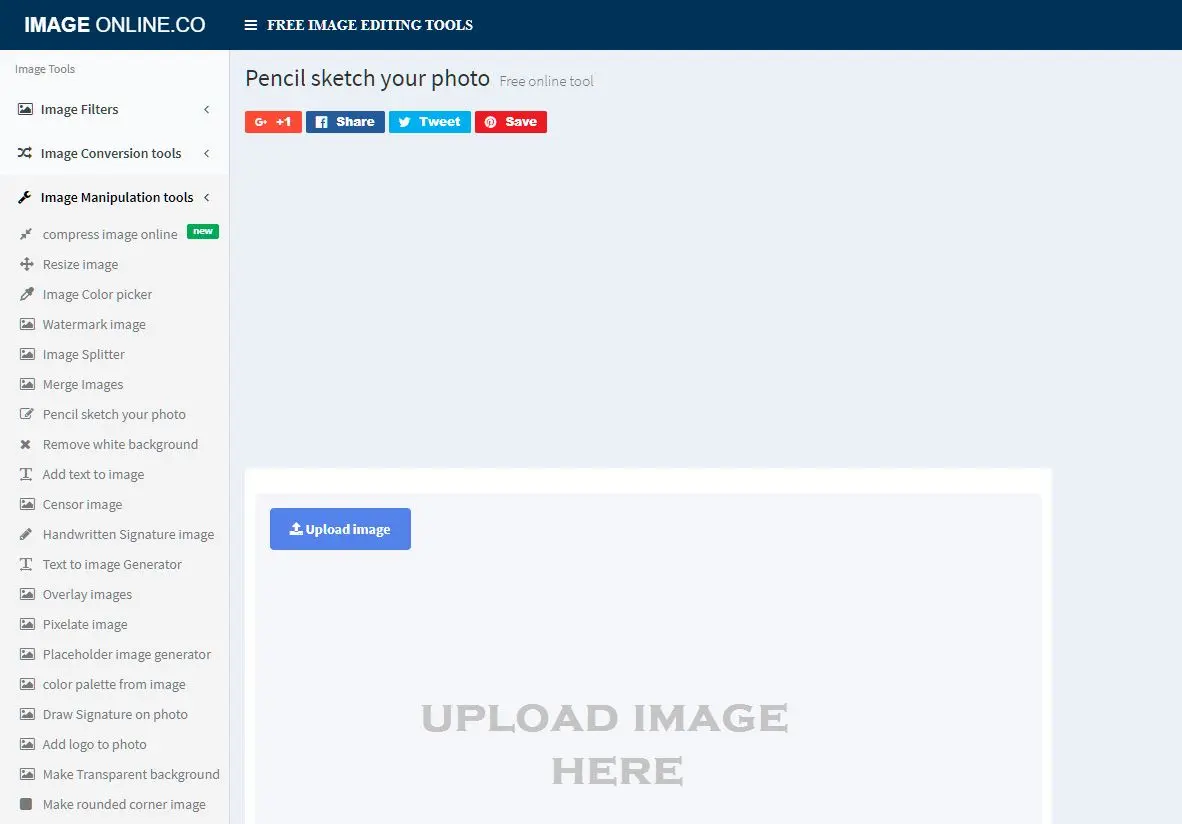
Pencil Sketch Online

Pencil Sketch Online..

It is a very simple and free-to-use tool. All you have to do is upload your photo and decide the intensity of the pencil strokes from 0 to 20.
The program automatically detects borders and gives you a lightly shaded sketch! The only drawback is that you cannot add colours, and the shading needs to be more realistic.

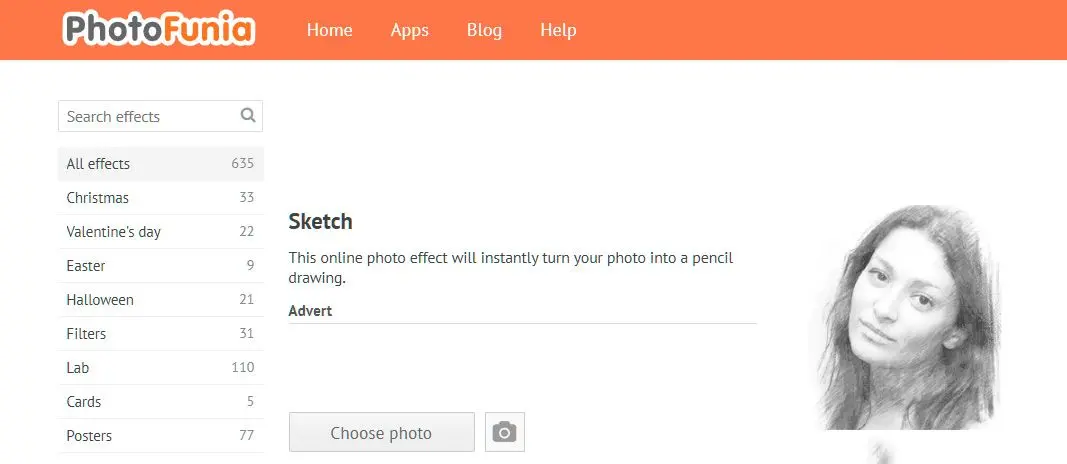
Photofunia

Photofunia..

Photofunia is another free app where you can convert your photos for free. You must upload the image and click on Go. The program will give you a black-and-white photo with an realistic pencil sketch within seconds!
It works well for minimalist portraits, although it gives even white areas a light grey shade and may not be suitable if you want a line drawing with thick borders.

How to use it:

Upload the photo

Choose the format of the final file and hit Send

Choose sketch effect

It will give you a detailed pencil sketch immediately.

Download the image

A small disadvantage of this program is that the sketches are created using strokes that slant from right to left, with almost no shading or hatching. So, the results only sometimes look natural.

Way #5: Best Picture to Realistic Drawing Apps

Let me tell you about a few of the best ones.

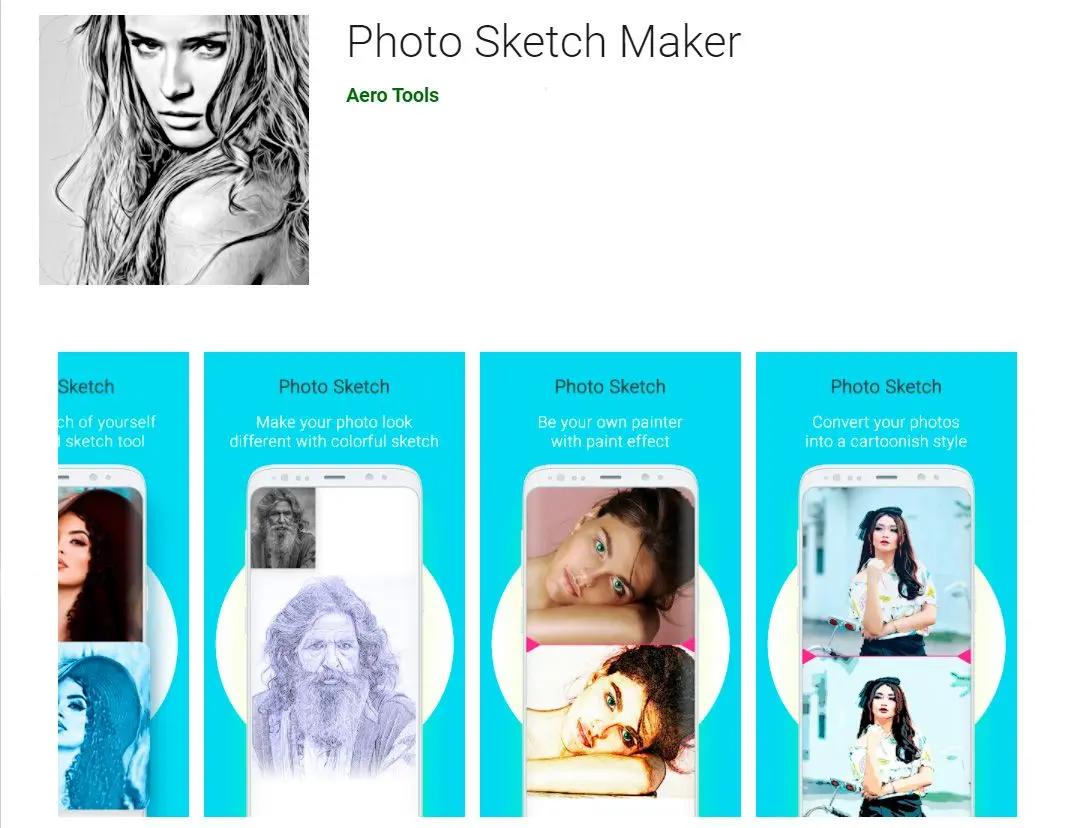
Photo Sketch Maker

Photo Sketch Maker..

One of the highest-rated apps in this category, the Photo Sketch Maker is an automatic image editor. After selecting the image you want to edit, you can choose from options like a pencil sketch, watercolour effect and much more.

My Sketch Pencil

My Sketch Pencil..

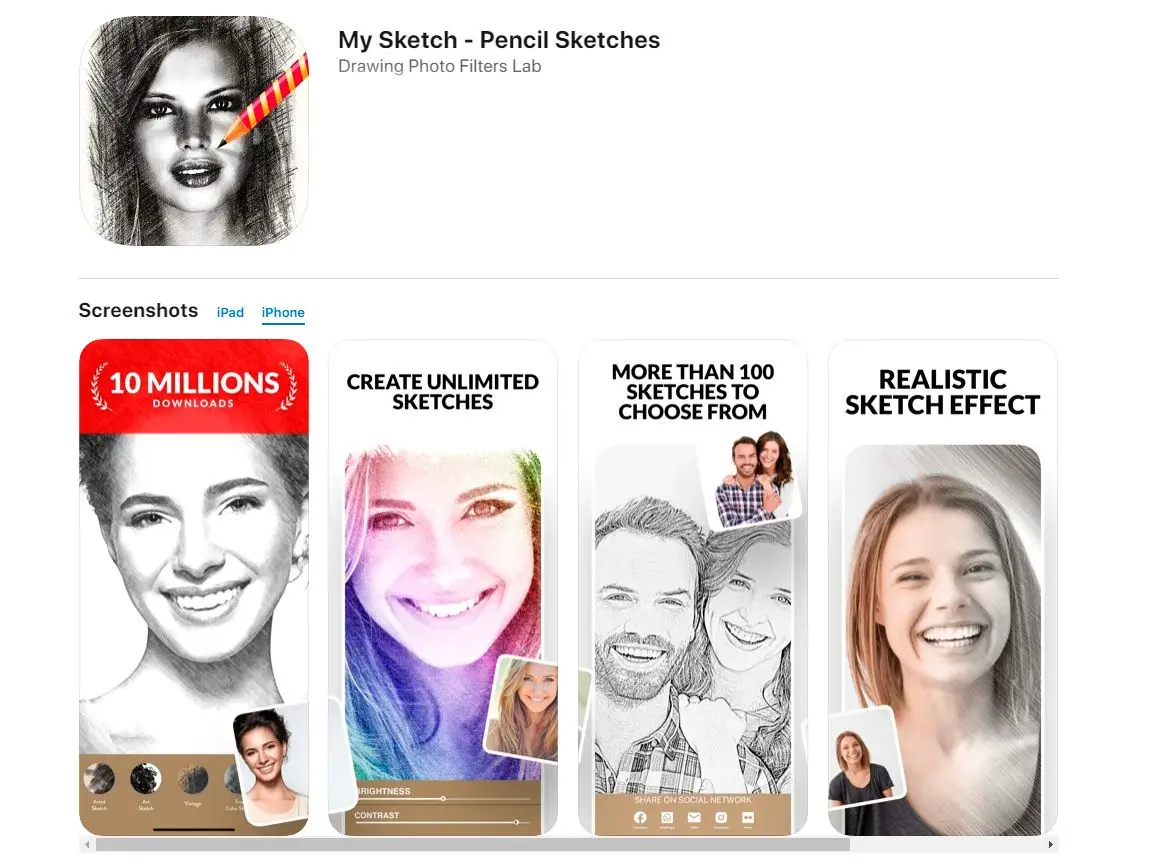
My Sketch Pencil is an app for iOS users. It offers up to 20 effects like art brush, smudge, vintage look etc., and gives a very realistic result. The only catch is that you’ll have to pay about $2 for the full version!

Sketch Photo Maker

Sketch Photo Maker..

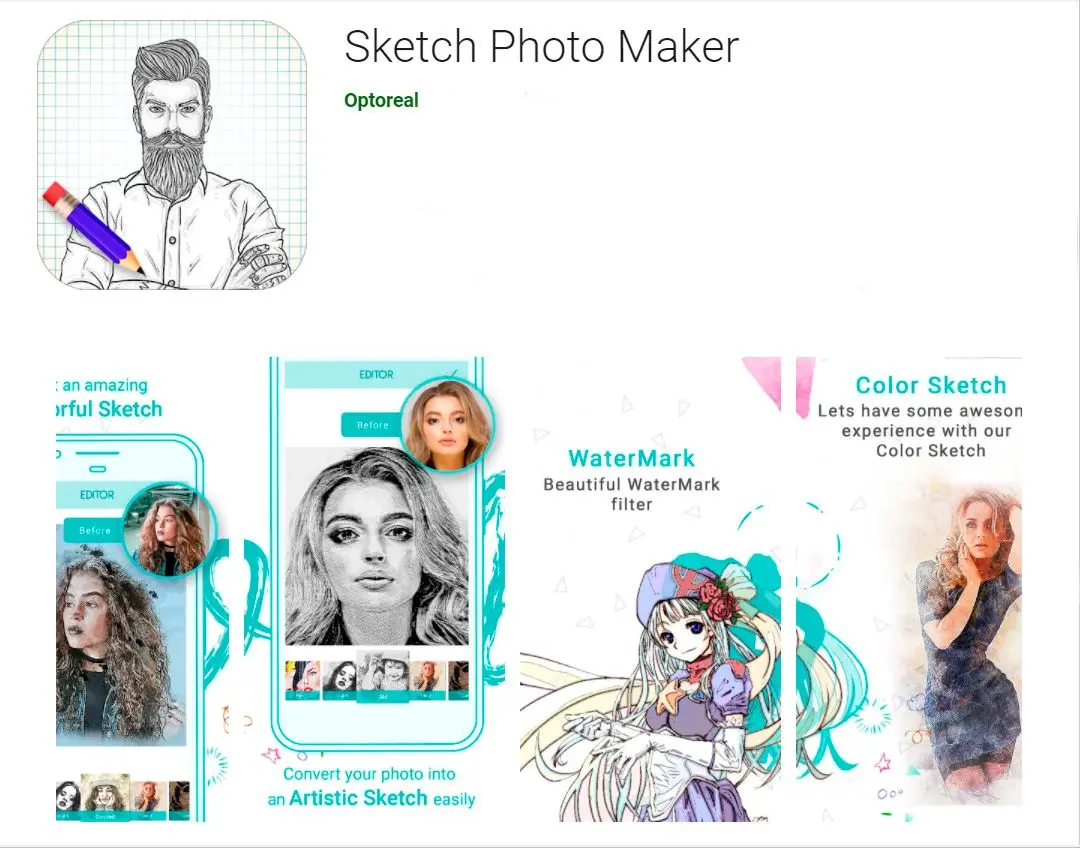
Another free app for Android users, Sketch Photo Maker, transforms any photo into a drawing automatically. It gives options like water painting, colour pencil effects, oil painting effects, cartoon styles and the classic black and white pencil effect. It even allows you to change the image to red, blue or green.

That is the most realistic photo to drawing converter?

I found the SoftOrbits Sketch Drawer an amazing program. I turn photo into a realistic hand-drawn sketch with just a few clicks! It gives me many presets like watercolour effects and felt tip drawing and even lets to make fine adjustments like edge strength, hatching and stroke lengths.