1. 1️⃣ Download and Install SoftOrbits Batch Picture Resizer.
  2. 2️⃣ Upload Your RAW Images to the Program.
  3. 3️⃣ Select the Desired Output Format.
  4. 4️⃣ Choose Additional Settings if Necessary.
  5. 5️⃣ Convert Your Photos.
 Download for Free
️Posted by:
Eugene editor-in-chief of the SoftOrbits, candidate of sciences in computer science, CTO of the SoftOrbits / 📅 Last updated on:  2024-05-24

Ah, the days when I first ventured into photography with my trusty Nikon camera. But as I delved deeper and opened .NEF files in Lightroom, a whole new world unfolded. But now my photo arhive takes too much disk space. To save time without compromising quality, SoftOrbits Batch Picture Resizer came to the rescue.
With it, I efficiently processed my archives, ensuring every photo met my standards without hours spent in complex editors.

📙Quick summary

  1. Convert Your RAW Photos using SoftOrbits Batch Picture Resizer   
      Download 
  2. Dilemma of a Photographer: Software Alternatives   Read More
  3. Top 3 Online Tools to Convert Nikon RAW Files   Read More

Way #1 How to use SoftOrbits Batch Picture Resizer

With this raw file converter, users can batch-convert digital photos from Nikon cameras – such as NEF, NRW and NAI – into a more universal formats, like JPEG or PNG.

Using SoftOrbits Batch Picture Resizer for Nikon Files Conversion:

First select the raw files that you want to convert
Add raw image files ..

Then choose the desired output format
Select jpeg and tiff ..

And finally click Start
Process editing software ..

Batch Picture Resizer Batch Picture Resizer

Resize and convert pictures in full auto mode!

 Download for Free

Video Tutorials

Once these few steps are completed, will do the rest for you; processing your images quickly and accurately using up-to-date algorithms. If you work with RAW imagery from Nikon cameras, then SoftOrbits Batch Picture Resizer is an invaluable software tool to have in your arsenal!

Way #2 Dilemma of a Photographer: Nikon Conversion Software Alternatives

At SoftOrbits, our goal is to deliver accurate and trustworthy information.

  • We pick products for reviews based on what people like and what is popular.

  • Our testing phase focuses on spotlighting the prime features of a product and identifying its most suitable software.

  • User reviews from top sites guide us in crafting our product reviews.

  • We gather feedback from our users, understanding their thoughts on SoftOrbits software and other products.

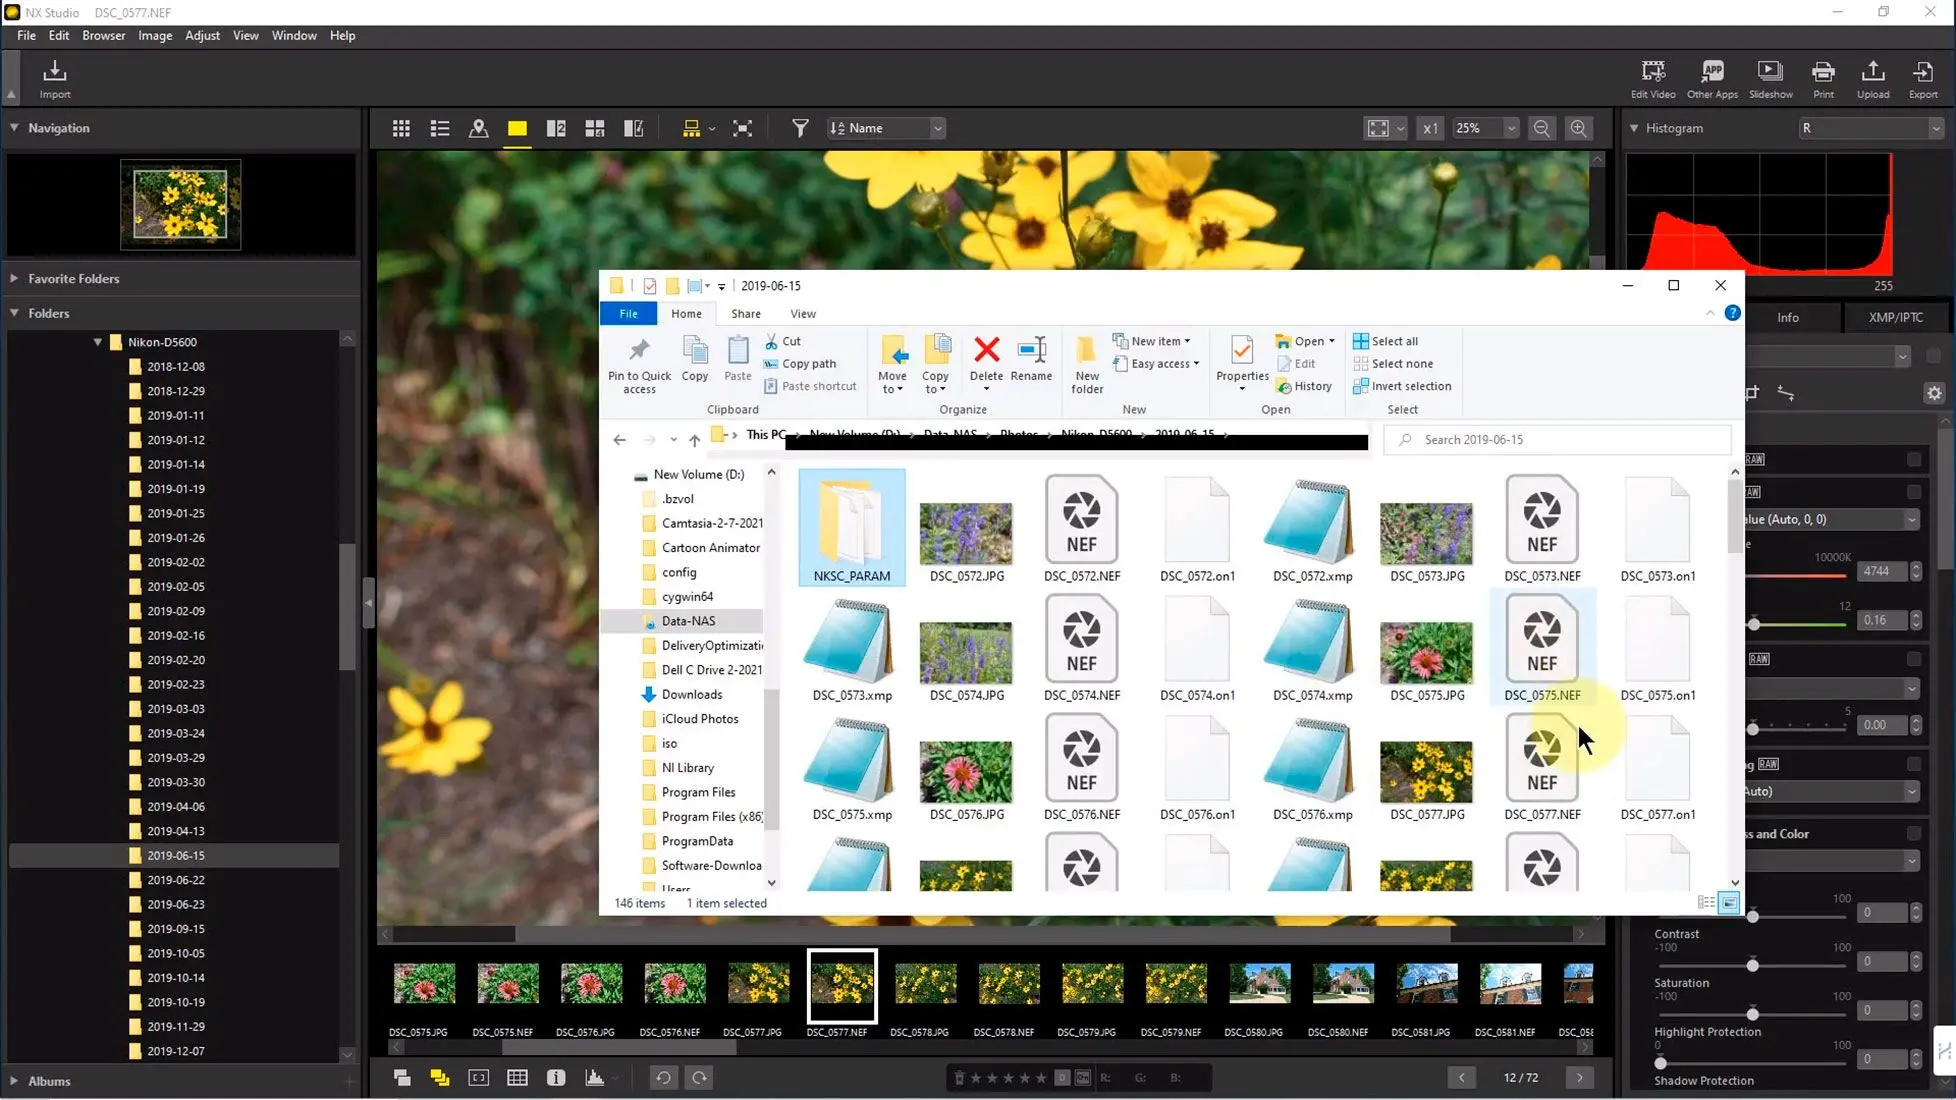
Among the array of suggestions put forth, NX Studio garnered attention for its reliability and adeptness in deciphering encrypted settings from NEF files. This capability ensured a seamless translation of the original camera settings into the converted images, but could be slower compared to other options.

Alternatively, RawTherapee and Darktable emerged as contenders acclaimed for their robust editing functionalities. Despite the acknowledgment of Darktable's steep learning curve, users commended its prowess in manipulating images to desired outcomes.
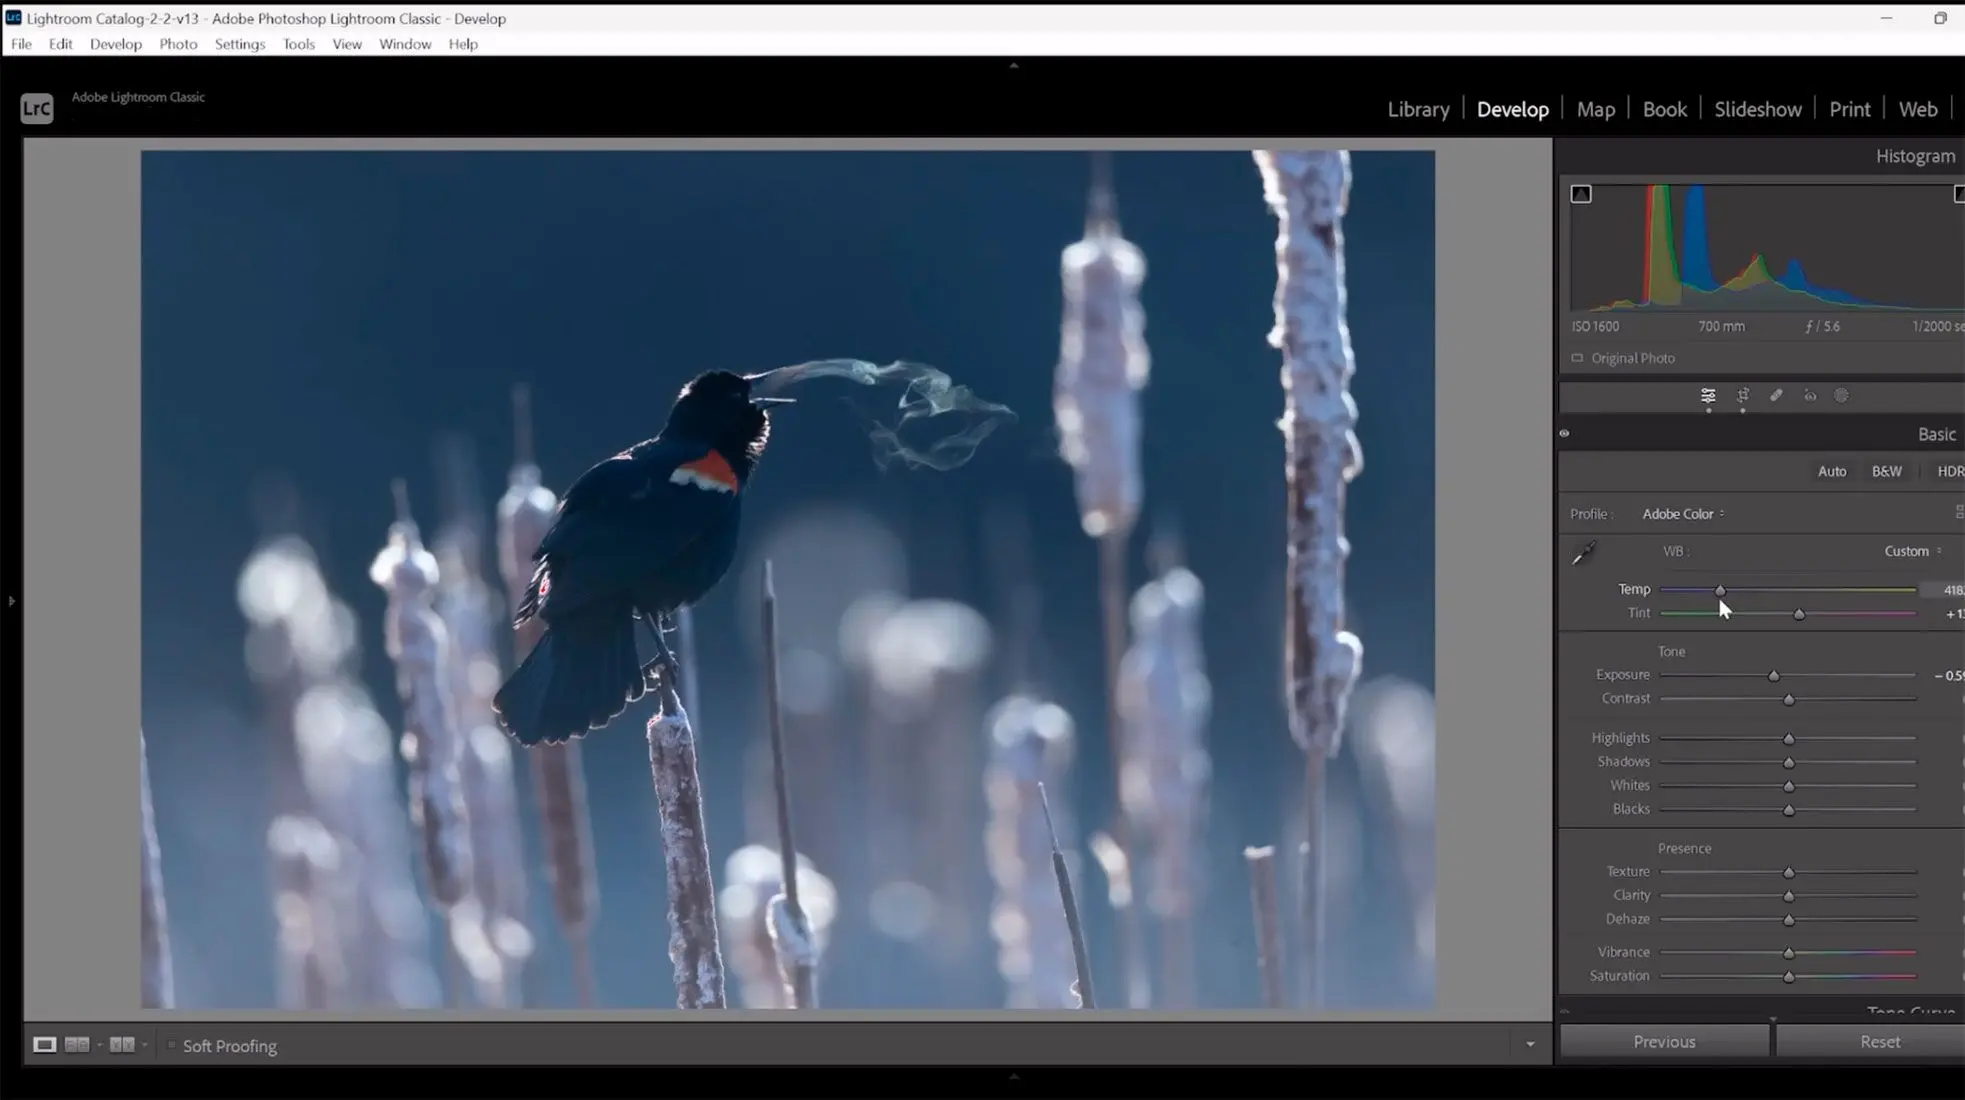
However, it was Lightroom that emerged as the frontrunner, celebrated for its adeptness in batch processing—a feature instrumental in managing substantial volumes of images efficiently. Nevertheless, some cautioned against the temptation to directly convert files sans preprocessing, citing the risk of yielding lackluster results.

Guide to Converting Nikon RAW Files Using NX Studio

Nikon capture nx-d program..

Install Nikon Software

Begin by downloading and installing the software provided by Nikon onto your computer. Ensure compatibility with your operating system.

Connect Camera or Insert SD Card

Connect your camera to your computer via USB cable or insert the SD card containing the files into your computer's card reader.

Launch the Nikon Software

Open the tool on your computer. Upon launching, you will be greeted with the main interface of the software.

Import RAW Files

Navigate to the File menu and select Import Files. Choose the location of your RAW files and select the ones you wish to convert. Click Open to import them into program.

View and Organize Files

Once imported, your files will be displayed in the software. Use the navigation tools to view and organize your files as needed.

Make Adjustments (Optional)

Make any desired adjustments to enhance your images before conversion.

Convert RAW to JPEG

After making any necessary edits, navigate to the File menu and select Convert Files. Choose the desired output format and select the destination folder for the converted files.

Start Conversion

Click Convert to initiate the conversion process. Will process and save your files as JPEGs in the specified destination folder.

Review Converted JPEGs

Once the conversion is complete, navigate to the destination folder to view your converted files. You can now use these files for sharing, printing, or further editing as needed.

Save and Exit

After reviewing your converted files, you can save any changes and exit the software.

Guide to Converting RAW Files Using Lightroom

Lightroom..

Install Adobe Lightroom

Begin by downloading and installing Adobe Lightroom onto your computer. Ensure compatibility with your operating system.

Import RAW Files

Launch Lightroom and navigate to the Library module. Choose the location of your Nikon files and select the ones you wish to convert. Click Import to import them into Lightroom.

Organize Files

Once imported, your files will appear in the Library module. Use Lightroom's organizational tools to manage and categorize your files as needed.

Fine-tune (optional)

Lightroom lets you fix your pics in lots of ways (light, color, etc.). Use the Develop module to make any desired adjustments to enhance your images before conversion.

Configure Export Settings

After editing, navigate to the File menu and select Export. In the export dialog box, choose the desired output format (JPEG) and specify the export settings, such as file naming, quality, and resolution.

Choose Destination Folder

Select the destination folder where you want the converted files to be saved.

Start Export Process

Once you have configured the export settings and chosen the destination folder, click the Export button to initiate the conversion process. Lightroom will process and save your files as JPEGs in the specified location.

Review Converted JPEGs

Once the export is complete, navigate to the destination folder to view your converted files. You can now use these files for sharing, printing, or further editing as needed.

Save and Exit

After reviewing your converted files, you can save any changes made in Lightroom and exit the software.

Way #3 Top 3 Online Tools to Convert Nikon RAW Files

Online Convert

Online Tool..

Online Convert: Convert all your files (easy online tool).

Pros

User-friendly interface, suitable for beginners.

Supports a wide range of files for conversion.

No software installation required; accessible from any web browser.

Cons

Limited editing capabilities compared to dedicated software.

Conversion speed may vary depending on file size and internet connection.

Privacy concerns associated with uploading files to online servers.

Convertio

Convertio..

Convertio: Convert files online (even from cloud storage!).

Pros

Integration with cloud storage services for easy file upload.

Basic editing tools available for image customization.

Supports a wide range of files for conversion.

Cons

Free version may have limitations on file size and number of conversions per day.

Conversion speed may be affected by internet connection and server load.

Privacy concerns related to uploading files to third-party servers.

Zamzar

Zamzar..

Zamzar is an online file conversion service. Enabling users to convert multiple images simultaneously.

Pros

Batch conversion feature for converting multiple files at once.

Option to receive converted files via email or download link.

Supports a wide range of files.

Cons

Conversion speed may vary depending on file size and server load.

Email delivery option may have file size limitations.

Limited editing capabilities compared to dedicated software.

Comparison of PC programs and online converters

When it comes to converting files, there are two main options available; using a dedicated PC program or an online converter.

Online Converter..

PC image programs: More control, do more stuff! (batch editing, filters, sharpen/blur, colors & more)
Online converters on the other hand, provide a much simpler solution and are often free to use. While they're often limited when it comes to features, they usually offer fast conversion speeds and easy-to-use interfaces. For most photographers who just want a simple way of converting their files, online converters aren't often the most convenient option.

RAW Converter as Batch Picture Resizer for Nikon

Pros:

Cons:

Convert multiple photos in minutesCan require technical knowledge to use correctly
Can use advanced features and tools
More control over the output image
Compatible with a wider range of files

Nikon RAW files online converters

Pros:

Cons:

Easy to use interfacesLimited features
Usually free to useSlowly, if you need to convert many files
May not be compatible with some file formats

We'll show you how to use our SoftOrbits Nikon RAW converter to convert your RAW files into more popular formats.
 Download for Free


🙋Frequently Asked Questions

You can easily convert Nikon NEF files to like as JPEG, TIFF, or others using dedicated software for cameras on your PC.

Yes! Edit photos without hurting the original (keeps original file).

Faster edits, sharper pics, smoother work - that's this software!

Similar to Capture NX-D/Pro, but easier to use & has special tools.